I have a few lace book marks now, this is the first one that I have used variegated thread in. I had picked up the thread in Spotlight one day , wondering how it would be for my lace making. In reality, it is a bit flimsy for a bookmark, I think I would like it with a bit more oomph. Still it's pretty.
So how did this book mark come about? I was searching through my patterns one day looking for another handkerchief edge to work. I found one, and beside it was this book mark. They both looked easy, mmmmmmm......... yeah right!
I drew up the pricking for the edge, and was so grateful I started on a sample first. No matter how hard I tried, or how many times I tried, I just could not work it out. In the end I asked the on-line community of lace makers that I know who gave me all kinds of help. The main piece of advice I got was that it was 'triangular ground', so the research began. It took a while, but thanks to You-Tube, I now know how to work triangular ground.
OK, so I got my edge started, but I needed something to take to my lace meeting. The edge was being worked on my block pillow, and it is a bit bulky to take to our limited space. So I drew up the pricking for the book mark. It could be worked on my cookie pillow and there was room for that at our lace meetings.
I wanted to have it started at least before the meeting, so that I wouldn't get stuck and have nothing to do for three hours. So a week before I wound bobbins and tried to start it. I got so far then got stuck. The pattern had something called a double eyed spider, something I have not done. It's in one of my books, but no matter how hard I tried I just could not work it out. I think I was just in a hurry.
In the end I changed my pricking, and put in a whole stitch ground diamond instead of the double eyed spider. It looks OK, not as pretty as the spider, but still pretty.
Ok, so this one is finished. What's next? You will all just have to come back for another visit to find out.
Friday, November 17, 2017
Friday, November 03, 2017
Art Journal Pg 8
This page of my supposed art playing has been done for quite some time, about six moths in fact. I have got a bit bored with it and left it for some time. Well, maybe not bored, just not happy with what I am doing. This page is OK, it's some of the subsequent ones that I do not like. But more about that later.
This is page eight, and the page is similar to page seven. It was first mod podged, washed with colour, then sprinkled with salt and left to dry. The lines are drawn with a fine black felt tipped pen, then the number eight was cut from a magazine and glued in place.
Art and drawing comes way behind stitching in my life. I am trying to get better. Art is definitely in the eye of the beholder, and mine is maybe to be used for inspiration for my stitching. Would I use this one? Maybe. Maybe a cut cross section that has been enlarged. Watch this space to see what happens.
This is page eight, and the page is similar to page seven. It was first mod podged, washed with colour, then sprinkled with salt and left to dry. The lines are drawn with a fine black felt tipped pen, then the number eight was cut from a magazine and glued in place.
Art and drawing comes way behind stitching in my life. I am trying to get better. Art is definitely in the eye of the beholder, and mine is maybe to be used for inspiration for my stitching. Would I use this one? Maybe. Maybe a cut cross section that has been enlarged. Watch this space to see what happens.
Wednesday, September 27, 2017
A Bobbin Lace Hankie
Behold, my new lace edged handkerchief!
It's been a very long time happening. from the first day I contemplated making it, until the day it was finished, it has been nearly eight years. Mmmm..... that is a long time, but there are prickings to draw up, handkerchief linen to source & buy, decisions to be made about thread, threads to source & buy, decisions about how big to make the pricking, then sourcing and buying a lace pillow to work it. Then we get to the actual working of the lace itself, which took me about two years. I might add here that there have been plenty of other projects happening over the same time frame.
Lets start at the beginning. Quite some years ago I acquired a book called 'Bedfordshire Lace-making' by Pamela Nottingham. When I looked through the book, my toes began to curl in absolute delight. Another lace-maker I knew also had this same book , and as it was set out in lesson format, we decided to work through it together. I might add here that that challenge has long gone as life has got in the way for both of us. I have still continued on in my own time though.
For the lessons up to this point, I had only done samples, and I was tired of making samples. I wanted a finished project, so I decided to make this edging into a handkerchief .There was lots of learning involved, from using slubby linen thread, to making even tallies ( yeah right!) and working six pair crossings to make those little flowers. Then there was the joining. The little flowers were certainly a challenge, and there are no two alike. Someone told me it is just as in nature.
I was advised to use a linen thread, but in reality I may just not ever use it again. The slubs made it difficult to tension, especially in those tallies. It also snapped a lot, meaning there are joins in my edge everywhere. I was told that linen thread is the traditional thread used in Bedfordshire lace, but recently I was told that a lot of Bedfordshire lace makers now use cotton thread. Mmm...... something to think about for the next one.
There are 224 tallies in this edge. I have been told that I have to make 1000 before I can get the right. I think I have a few more to go. The next ones will be in a cotton thread I am sure.
Once the lace was finished and joined, I then had to mount it to my linen fabric. I had a few different suggestions as to how to do it, but chose something called 'Nun's Stitch' to mount it. I had to find out how to do it, then learn how to do it, but in the end it was easy, and it gave a little pinstitch along the edge which is pretty.
It may not be perfect, but the mistakes and inconsistencies in it show that it is hand made. I am extremely proud of what I have done. It is my first ever bobbin lace handkerchief edge that I have done and there will be more. Watch this space!
Friday, September 15, 2017
A Christmas Star
This is the third in my series of bobbin lace Christmas decorations, and I think my favourite one yet. The patterns have come from an old Anna magazine. I have used the same thread as the other two, a DMC Cordonnet Special No 50. This thread is fine for cloth stitch, but it doesn't handle plaits and picots all that well. I was warned many years ago about using crochet threads, something about the direction of the twist. I may have to just remove the picots off it if I do any more.
Still, it is done, and will hang prettily on my Christmas tree in a few months.
Friday, September 08, 2017
Fingerless Gloves
Back in early July , when winter was biting well, I misplaced my one and only pair of finger-less gloves. Since then I have made a replacement pair, and now I have made a second pair.
These have been finished for a few weeks now, and while winter is having it's last little bight, they will be useful.
They have been made in 4 ply Shepherd Baby, which is 100% wool, and very very warm.
They will be a very handy second pair if the glove eaters decide to come back and visit again.
These have been finished for a few weeks now, and while winter is having it's last little bight, they will be useful.
They have been made in 4 ply Shepherd Baby, which is 100% wool, and very very warm.
They will be a very handy second pair if the glove eaters decide to come back and visit again.
Friday, September 01, 2017
A New Scarf
This is my new scarf that I finished about a week ago.
Born out of scraps, it is knitted in a drop stitch pattern in two different yarns. One is Morris Empire, a 100% merino 8 ply, while the second is Noro Silk Garden Lite, a 45% silk, 45% mohair and 10 % wool yarn from Japan. The Noro is a variegated yarn, and creates a lovely colour change throughout the scarf.
It's lovely and warm, so will have to be packed away until next winter now.
Thursday, July 27, 2017
A Little Christmas Stocking - Bobbin Lace Style
I've finished another little bobbin lace Christmas decoration. It's from the same series as the little bell I made back earlier in the year. This is also made in DMC Cordonnet Special No 50 thread.
When I made my bell, I was happy with the thread choice, but this time around it's a different story. I like it for the cloth stitch, but not for the plaits. The plaits are a little but cumbersome. Maybe next time I will change the inside decoration to something else. Time will tell.
In the meantime, I have started number three in the series of six. So watch this space to see what it is. It may be a while, there are quite a few other projects happening that are priority.
When I made my bell, I was happy with the thread choice, but this time around it's a different story. I like it for the cloth stitch, but not for the plaits. The plaits are a little but cumbersome. Maybe next time I will change the inside decoration to something else. Time will tell.
In the meantime, I have started number three in the series of six. So watch this space to see what it is. It may be a while, there are quite a few other projects happening that are priority.
Thursday, July 13, 2017
Crazy Gloves
Meet my new pair of crazy gloves. They are finger-tip-less, ( is there such a word?) and very warm. I believe in the real world they are called finger-less gloves, but I made them so they only just expose my finger tips.
A few years back I never wanted, needed, or thought I would even like these type of gloves. I couldn't see the point. Why expose your finger tips to the cold? But then my hands started getting dry from the winter winds as I pegged washing on the line, and no amount of hand cream would help. A male member of the family suggested I use rubber gloves, but I found these cumbersome . Then I had a brilliant idea to make a pair to fit my hands, so I did, and loved them.
Then about two weeks ago they decided to play hide and seek with me. I had used them in the morning to peg out the washing, then wore a pair of full fingered ones on my walk to the shops later that morning. The next morning I went looking for my finger-less ones again to hang washing out , and they were no where to be found. In winter, they normally live in my dressing gown pocket, jacket pocket, coat pocket, pants pocket, on the kitchen bench, on the dressing table or sometimes on the coffee table in the lounge room, but they were in none of these places. I started to think what I had done between hanging out washing and walking to the shops. In general, I have turned the house upside down looking for them, and yes, they are still hiding.
Another male member of my family suggested I cut the tips out of another pair that I already had. Mmmmm............. yes, well......... The male members of my family have no idea of fabric construction, and besides, most of the gloves I own are my own hand knitted ones. There was no way I was doing this to my handiwork. I could, however, do it to an old stained pair of white cotton gloves, so I did. There was a little bit of warmth, they did stop the wind, and they kept me out of trouble until I could make another pair.
I had only one 50gm ball of navy 4 ply yarn and thought this would be enough. Not so. It only got me one glove, and the hand section of the second one. Now what to do? I at least needed some section of the fingers on this second one. So I pulled out a ball of sky blue 4 ply that I had and added the fingers to complete the glove. Then I added some stitching to tie them together as a pair. Mmmmm........ interesting to say the least.
At least they are warm, they will stop the wind, and I am sure that now I have another pair the original pair will come out of hiding. Lets hope they do, because then I will have two pair
A few years back I never wanted, needed, or thought I would even like these type of gloves. I couldn't see the point. Why expose your finger tips to the cold? But then my hands started getting dry from the winter winds as I pegged washing on the line, and no amount of hand cream would help. A male member of the family suggested I use rubber gloves, but I found these cumbersome . Then I had a brilliant idea to make a pair to fit my hands, so I did, and loved them.
Then about two weeks ago they decided to play hide and seek with me. I had used them in the morning to peg out the washing, then wore a pair of full fingered ones on my walk to the shops later that morning. The next morning I went looking for my finger-less ones again to hang washing out , and they were no where to be found. In winter, they normally live in my dressing gown pocket, jacket pocket, coat pocket, pants pocket, on the kitchen bench, on the dressing table or sometimes on the coffee table in the lounge room, but they were in none of these places. I started to think what I had done between hanging out washing and walking to the shops. In general, I have turned the house upside down looking for them, and yes, they are still hiding.
Another male member of my family suggested I cut the tips out of another pair that I already had. Mmmmm............. yes, well......... The male members of my family have no idea of fabric construction, and besides, most of the gloves I own are my own hand knitted ones. There was no way I was doing this to my handiwork. I could, however, do it to an old stained pair of white cotton gloves, so I did. There was a little bit of warmth, they did stop the wind, and they kept me out of trouble until I could make another pair.
I had only one 50gm ball of navy 4 ply yarn and thought this would be enough. Not so. It only got me one glove, and the hand section of the second one. Now what to do? I at least needed some section of the fingers on this second one. So I pulled out a ball of sky blue 4 ply that I had and added the fingers to complete the glove. Then I added some stitching to tie them together as a pair. Mmmmm........ interesting to say the least.
At least they are warm, they will stop the wind, and I am sure that now I have another pair the original pair will come out of hiding. Lets hope they do, because then I will have two pair
Tuesday, June 13, 2017
A Bobbin Lace Edging
I've been making some very slow progress on my lace edging. It's an edging from the Pamela Nottingham book of Bedfordshire Lace making.
Started quite some time ago with the drawing up of the pricking and planning on how it was actually going to be worked. It took even more time to get started on the actual piece, and even more time to work!
I'm on side three at the moment and coming up my third corner, ready for the last leg to the finish. The join is scaring me a little, but I have had some help from an on-line group of lace makers who are very free with advice and help. As a result, the last corner and final join are not so scary any more.
So watch this space to see the final product. it may still be a while yet though.
Started quite some time ago with the drawing up of the pricking and planning on how it was actually going to be worked. It took even more time to get started on the actual piece, and even more time to work!
I'm on side three at the moment and coming up my third corner, ready for the last leg to the finish. The join is scaring me a little, but I have had some help from an on-line group of lace makers who are very free with advice and help. As a result, the last corner and final join are not so scary any more.
So watch this space to see the final product. it may still be a while yet though.
Wednesday, May 10, 2017
A New Red Hat
I had some crimson coloured yarn left over after knitting my cabled jumper last year. The yarn is 'Savanah" yarn, which is a 70% wool, 30% alpaca yarn from Bendigo Wollen Mills.
This time I wanted a more slouchy hat, more of a beret than the previous brown one I made. I had a sheet which gave me how to start a spiral shape for a shawl, and I figured I could do this, continue out for the diameter I needed, then decrease back to the circumference of my head. So that's exactly what I did.
My new hat is warm, it fits me perfectly, and slouches just how I want it. Now I want one of these in every colour! I might even venture to putting a pattern in it somehow. That just might take a little figuring out how to do. Watch this space to see what I come up with!
Wednesday, May 03, 2017
A Winter hat
This hat was born from a discussion with my friend M---- as to what to do with left over knitting yarn. I usually make scarves, but have a box full of them, so she suggested a hat.
Tight fitting hats such as beanies never really suit me, and I have been on the lookout for beret style knitted hats for a while. There are a lot of "slouchy" hat patterns around the internet, and I figured these would be similar to a beret style, so I had a little hunt to see what I could find.
The pattern I chose was 'Springtime In Philadelphia" which I found free on Ravelry. It was supposed to be worked in a fingering yarn, which is about a 4ply in Australian yarn, My yarn was an 8ply Morris Empire "Clove" 100% merino yarn, which was left over from my cardigan. Mmmm....... what to do. I could keep hunting for something in an 8 ply, or use smaller needles.
In the end it came down to what needles I had. The pattern began on double pointed needles, and I had a set of old size 9, or finer ones for working with 4 ply. I chose to use the old size 9 ( 3.75mm) and just went for it. When it came to the band, I used my circular needles in 3.25mm.
Over all it is a little big, but at the end of the day that is OK. It still covers my ears and I am sure it will stay but on a windy day.
Tight fitting hats such as beanies never really suit me, and I have been on the lookout for beret style knitted hats for a while. There are a lot of "slouchy" hat patterns around the internet, and I figured these would be similar to a beret style, so I had a little hunt to see what I could find.
The pattern I chose was 'Springtime In Philadelphia" which I found free on Ravelry. It was supposed to be worked in a fingering yarn, which is about a 4ply in Australian yarn, My yarn was an 8ply Morris Empire "Clove" 100% merino yarn, which was left over from my cardigan. Mmmm....... what to do. I could keep hunting for something in an 8 ply, or use smaller needles.
In the end it came down to what needles I had. The pattern began on double pointed needles, and I had a set of old size 9, or finer ones for working with 4 ply. I chose to use the old size 9 ( 3.75mm) and just went for it. When it came to the band, I used my circular needles in 3.25mm.
Over all it is a little big, but at the end of the day that is OK. It still covers my ears and I am sure it will stay but on a windy day.
Wednesday, April 26, 2017
Art Journal Pg 7
For my art journal page seven I did something different again.
I first prepared the page with mod podge, then gave it a sponge with a wash of aqua and white paint. The page became quite wet again, so this time I sprinkled some rock salt onto the page and let it dry. A bit messy, but hey, it wasn't a blank page!
I had plans of cutting my numbers this time from a magazine page that I had saved. So once the page was dry, I drew my numbers in the magazine page, cut them out and glued them to my journal page.
I then began to draw lines with a black fine line felt tipped pen. At first I outlined the green blobs that had formed, then just added in wavy lines to connect them all together.
This page has been finished for some time, and I must admit I have been a bit slack with my art journaling. My knitting has taken over. I'll try to get back to it every day.
Tuesday, April 18, 2017
A New Cardigan
Behold, my new cardigan. This one began with inspiration on one of our trips away a few years ago. We were travelling from the Northeren Tablelands of NSW down to the coast, and stopped for a break in a little town not far from the Queensland border. The main street hugged the main highway, and it took no time at all to walk up one side and down the other. All the doors to the shops were closed, and it took no time at all to work out why. It was a main highway after all, and the sheep trucks travelling this highway were common. Enough said!
We did open the doors and walk in, and one was such a delight. It was a little haberdashery shop that sold everything from curtain fabric to knitting yarn. When we walked in, what caught my eye was a gorgeous cardigan on display. It was burgundy, and had a ruffle around the neck, down the front, curved at the hem, and at the hem of each sleeve. The ruffle was in a feather and fan pattern in a variegated burgundy yarn. Just gorgeous, and I wanted one!
We were on a time limit, and had yet to still make our way to the coast, so I didn't ask the shop attendant for the pattern. I figured it was current, and would be readily available anywhere. Mmmmm........ not so. When I came home I searched everywhere, even on line, and could not find a pattern similar. The closest I found was on another trip away, in another little country town, in another little haberdashery shop. This pattern was for a short sleeve cardigan, curved at the hem, but with a rib finish. It was a base to work from, I could lengthen the sleeves, lengthen the whole garment, and add the ruffle to finish it off.
So then the fun began in looking for yarn. I ended up with this Morris Empire "Clove" 100% merino yarn, and a Noro "Silk Garden Lite" 45% silk, 45% mohair 10% wool yarn in a variegated for the ruffle. After playing with the variegated in a sample of feather & fan, I decided to do the ruffle in the Clove, so went back to buy more. Then, after playing and thinking some more, I decided to eliminate the ruffle across the bottom at the back, and just have it down the front and on the sleeves, but that meant that I had to finish the back some other way, I didn't want a plain rib joining with a variegated ruffle at the side seam, so opted instead for a picot hem. The pattern was stocking stitch, boring, so I decided to add some interest, and dropped an eyelet in now and again in a pattern. The back was finished and was looking great.
Then came the front, which was much trickier. I can't remember the last cardigan I made, and if I did ever make one it would have had a straight front, not a curved one like this. All was going good, and I had created the bottom curve, and managed to drop the eyelets in at the same level and in the same pattern as the back. Then came the plain sailing up the front with no increases for a while. The Problem was that I had made the back longer than the pattern, without taking note of how many extra rows I had done. The front needed to be the same length, but it had a ruffle finish where the back had a hem, and I need to allow for this. It meant that I had to sit quiet, count rows, and work it all out. So it got put in the "too hard basket" to sort out later. I might add here it that it sat in that basket for quite some time,
Back in February I had finished off another jumper, and I had enjoyed the knitting so much I decided it was time to pull this one out and finish it. It was at this point that I decided that I really liked the picots combined with the eyelets, so decided to put a band with a picot edge around the front, and to do the same hem on the sleeves.
It is now finished, not quite as I first imagined, but it is warm and very wearable. As for the rounded bottom, I think I would only do that again for something lighter, like a 100% cotton in a short sleeve.
Now I have yarn left, about five balls of the 'Clove', and four balls of the Noro. Watch this space to see what happens with them.
We did open the doors and walk in, and one was such a delight. It was a little haberdashery shop that sold everything from curtain fabric to knitting yarn. When we walked in, what caught my eye was a gorgeous cardigan on display. It was burgundy, and had a ruffle around the neck, down the front, curved at the hem, and at the hem of each sleeve. The ruffle was in a feather and fan pattern in a variegated burgundy yarn. Just gorgeous, and I wanted one!
We were on a time limit, and had yet to still make our way to the coast, so I didn't ask the shop attendant for the pattern. I figured it was current, and would be readily available anywhere. Mmmmm........ not so. When I came home I searched everywhere, even on line, and could not find a pattern similar. The closest I found was on another trip away, in another little country town, in another little haberdashery shop. This pattern was for a short sleeve cardigan, curved at the hem, but with a rib finish. It was a base to work from, I could lengthen the sleeves, lengthen the whole garment, and add the ruffle to finish it off.
So then the fun began in looking for yarn. I ended up with this Morris Empire "Clove" 100% merino yarn, and a Noro "Silk Garden Lite" 45% silk, 45% mohair 10% wool yarn in a variegated for the ruffle. After playing with the variegated in a sample of feather & fan, I decided to do the ruffle in the Clove, so went back to buy more. Then, after playing and thinking some more, I decided to eliminate the ruffle across the bottom at the back, and just have it down the front and on the sleeves, but that meant that I had to finish the back some other way, I didn't want a plain rib joining with a variegated ruffle at the side seam, so opted instead for a picot hem. The pattern was stocking stitch, boring, so I decided to add some interest, and dropped an eyelet in now and again in a pattern. The back was finished and was looking great.
Then came the front, which was much trickier. I can't remember the last cardigan I made, and if I did ever make one it would have had a straight front, not a curved one like this. All was going good, and I had created the bottom curve, and managed to drop the eyelets in at the same level and in the same pattern as the back. Then came the plain sailing up the front with no increases for a while. The Problem was that I had made the back longer than the pattern, without taking note of how many extra rows I had done. The front needed to be the same length, but it had a ruffle finish where the back had a hem, and I need to allow for this. It meant that I had to sit quiet, count rows, and work it all out. So it got put in the "too hard basket" to sort out later. I might add here it that it sat in that basket for quite some time,
Back in February I had finished off another jumper, and I had enjoyed the knitting so much I decided it was time to pull this one out and finish it. It was at this point that I decided that I really liked the picots combined with the eyelets, so decided to put a band with a picot edge around the front, and to do the same hem on the sleeves.
It is now finished, not quite as I first imagined, but it is warm and very wearable. As for the rounded bottom, I think I would only do that again for something lighter, like a 100% cotton in a short sleeve.
Now I have yarn left, about five balls of the 'Clove', and four balls of the Noro. Watch this space to see what happens with them.
Tuesday, March 28, 2017
A Little Christmas Bell - Bobbin Lace Style
This little Christmas bell was born from cleaning up my sewing table. In my clean-up I found some old magazines that I had picked up at one of my stitching groups. I had picked them up for a reason, and when I looked through one of them I found the pattern for this little bell. So I put it aside to have a good look at later.
When I picked it up again, there were actually six different decorations, and I believed I could do them all by myself, without any help. When I started reading, they were worked in a thread that I didn't know. Mmmm......... So I gathered together threads that I had that I thought may be suitable, and tottered off to my lace group, complete with the pricking I had made, my lace pillow, pins and other lace making paraphernalia.
I asked my lace teacher which thread would be best, and we settled on DMC Cordonnet Special No50. To me this is a crochet thread, and when I first started making bobbin lace, I was told not to use crochet thread. Mmmmmm...........
So I wound my bobbins and started off. The thread was actually a dream to use, and I would certainly use it again. The bell was actually quick to do, four hours of work including winding my bobbins.
I am actually very proud of my little effort. I have always wanted to make a bobbin lace Christmas decoration and now I have. There will be many more in the future.
When I picked it up again, there were actually six different decorations, and I believed I could do them all by myself, without any help. When I started reading, they were worked in a thread that I didn't know. Mmmm......... So I gathered together threads that I had that I thought may be suitable, and tottered off to my lace group, complete with the pricking I had made, my lace pillow, pins and other lace making paraphernalia.
I asked my lace teacher which thread would be best, and we settled on DMC Cordonnet Special No50. To me this is a crochet thread, and when I first started making bobbin lace, I was told not to use crochet thread. Mmmmmm...........
So I wound my bobbins and started off. The thread was actually a dream to use, and I would certainly use it again. The bell was actually quick to do, four hours of work including winding my bobbins.
I am actually very proud of my little effort. I have always wanted to make a bobbin lace Christmas decoration and now I have. There will be many more in the future.
Monday, February 20, 2017
A Bedfordshire Lace Bookmark
This little bookmark is a Bedfordshire lace one. It started as something to take to my lace meeting. I had ( and still do) a handkerchief edge on a pillow that I really wanted to do, but the pillow is a little cumbersome and uncomfortable to use at lace meetings. Something about the height, it is a block pillow, and high at the front. My other pillow is a cookie pillow, and nicer to work on, so I dug out the pricking for this bookmark and thought I would make another one. The pattern came from an Australian Lace magazine, summer 2005, and is by Olwyn Scott and Robyn Hueppauff..
I had made this bookmark before, about three years ago, and thought there would not be an issue. So I quickly gathered my supplies and off I went to lace. As I started to set up my pricking and sort out bobbins, I thought I had bobbins with thread left from a previous project, and thought I would use them. The thread in the container with the bobbins was a cotton one, so I assumed all the bobbins in with the thread would have that thread wound on them. As I started to set them up and begin to work the lace, I could see that there were two different threads. One was a linen, complete with slubs, and the other was a cotton. Would it matter if the bookmark was worked in two different threads? One way to find out!
So I continued on my merry way. It got started, worked a bit, then left for some time while life got in the way. Next time I picked it up I snapped a thread. Mmm........ I could cope with that. Just add in another one and knot later. Famous last words! If I snapped one thread, I snapped a hundred! I know that linen thread has problems in dry air, and I have been told to lay a damp cloth over my work to create humidity. So that's what I did. Most of this bookmark was worked in high summer in air-conditioning, so every afternoon when I packed it away for the day, I would lay a cover cloth, a damp tea towel, then another cover cloth, so creating a layer of humidity.
Although I had made this bookmark before, I still had to remember lots of things. It's been good practice for my tallies, and I had to remember how to make picots, ( thank goodness for reference books!) . Then there were issues with colours of thread to colours on the pricking, as well as issues with pins. I have also learnt how unforgiving half stitch is. Never mind, it is finished now, and the only person I have to please is myself.
Now watch this space for my handkerchief edge that will be coming soon, sometime hopefully this year.
I had made this bookmark before, about three years ago, and thought there would not be an issue. So I quickly gathered my supplies and off I went to lace. As I started to set up my pricking and sort out bobbins, I thought I had bobbins with thread left from a previous project, and thought I would use them. The thread in the container with the bobbins was a cotton one, so I assumed all the bobbins in with the thread would have that thread wound on them. As I started to set them up and begin to work the lace, I could see that there were two different threads. One was a linen, complete with slubs, and the other was a cotton. Would it matter if the bookmark was worked in two different threads? One way to find out!
So I continued on my merry way. It got started, worked a bit, then left for some time while life got in the way. Next time I picked it up I snapped a thread. Mmm........ I could cope with that. Just add in another one and knot later. Famous last words! If I snapped one thread, I snapped a hundred! I know that linen thread has problems in dry air, and I have been told to lay a damp cloth over my work to create humidity. So that's what I did. Most of this bookmark was worked in high summer in air-conditioning, so every afternoon when I packed it away for the day, I would lay a cover cloth, a damp tea towel, then another cover cloth, so creating a layer of humidity.
Although I had made this bookmark before, I still had to remember lots of things. It's been good practice for my tallies, and I had to remember how to make picots, ( thank goodness for reference books!) . Then there were issues with colours of thread to colours on the pricking, as well as issues with pins. I have also learnt how unforgiving half stitch is. Never mind, it is finished now, and the only person I have to please is myself.
Now watch this space for my handkerchief edge that will be coming soon, sometime hopefully this year.
Wednesday, February 08, 2017
A New Jumper
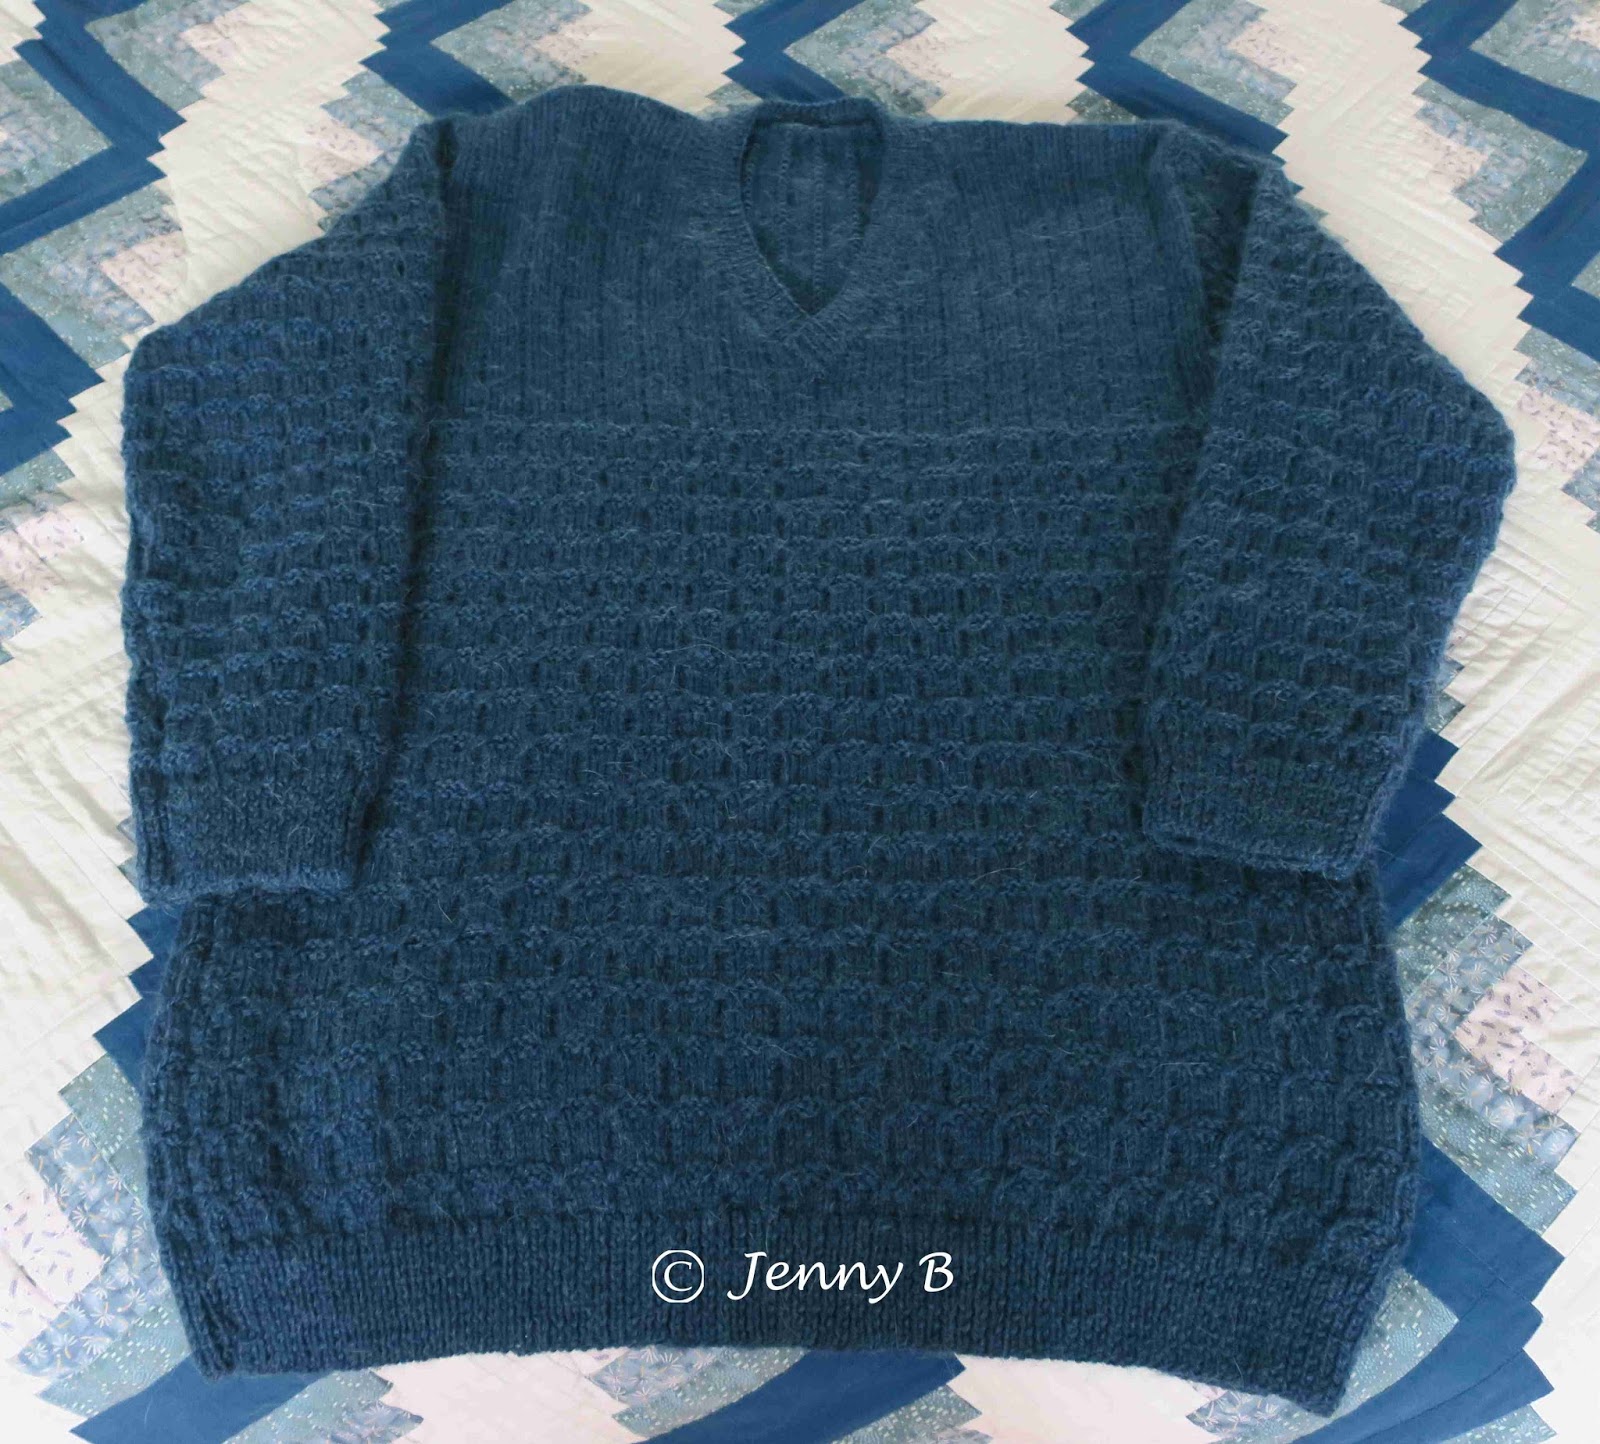
My latest finish! It is a new jumper for a male member of my family, knitted in an 8 ply Wool/Alpaca mix from Bendigo Woollen Mills. I am so glad this is finished. It is high summer at the moment, and as this got near completion, it became very heavy and very warm. I had to sit with the bulk of the jumper on the arm of the lounge while I knitted the neckband, and even with fans and air-conditioning, I occasionally struggled.
I had ordered the yarn way back in July last year, and thought I had ordered enough. Well, my calculations said I would have a small amount left over. Either the pattern amounts were incorrect, or I did my calculations incorrectly, but I did not have enough yarn left to do the neckband. I had to order more. As the bulk of the yarn was purchased in July, I knew that getting a ball of the same dye-lot would be extremely lucky. I was correct, and had to have a ball of another dye-lot. As it is the whole neckband, with a different texture than the top of the jumper, it's not noticeable.
The pattern is Sirdar 9248 purchased from Patternfish.
Now this one is finished, I wonder what will be next. UFO's and WIPS here I come.
I had ordered the yarn way back in July last year, and thought I had ordered enough. Well, my calculations said I would have a small amount left over. Either the pattern amounts were incorrect, or I did my calculations incorrectly, but I did not have enough yarn left to do the neckband. I had to order more. As the bulk of the yarn was purchased in July, I knew that getting a ball of the same dye-lot would be extremely lucky. I was correct, and had to have a ball of another dye-lot. As it is the whole neckband, with a different texture than the top of the jumper, it's not noticeable.
The pattern is Sirdar 9248 purchased from Patternfish.
Now this one is finished, I wonder what will be next. UFO's and WIPS here I come.
Wednesday, February 01, 2017
Art journal Pg 6
Page six of my art journal has been finished for some time, and as it lives opposite page five, the page is very similar.
This page was sealed with Mod Podge and wet sponge painted with an aqua coloured paint at the same time that I did page five.
After discovering that my ball point pen wouldn't show enough on these pages, I continued with the wedge tipped marker and drew my number six. From there, still using the wedge tipped marker, I marked out some basic lines that continued from the previous page, but also blended into my number six. This included the spiral in the center of the six.
Then I changed to my fine felt tipped pen and added in some patterns.
I have discovered that I quite like making patters on my pages, working out what I might use for making some lace designs or some future stitching. I also feel that by adding colour and using two different tipped pens is adding dimension to my pages.
It's all about experimentation for me in this new world of art journaling. I wonder what I will experiment with on my next pages?
This page was sealed with Mod Podge and wet sponge painted with an aqua coloured paint at the same time that I did page five.
After discovering that my ball point pen wouldn't show enough on these pages, I continued with the wedge tipped marker and drew my number six. From there, still using the wedge tipped marker, I marked out some basic lines that continued from the previous page, but also blended into my number six. This included the spiral in the center of the six.
Then I changed to my fine felt tipped pen and added in some patterns.
I have discovered that I quite like making patters on my pages, working out what I might use for making some lace designs or some future stitching. I also feel that by adding colour and using two different tipped pens is adding dimension to my pages.
It's all about experimentation for me in this new world of art journaling. I wonder what I will experiment with on my next pages?
You might also like:
Monday, January 30, 2017
Knitting
It's high summer here in OZ and really to hot hot to knit, especially with yarn that is a wool/alpaca mix. I'm managing though, with the help of fans, and air conditioning.
This little number is for a male member of the family, and was started back in November. So far I have completed the back, the front, and one sleeve. The second sleeve is almost done, and then I just have to stitch the pieces together and do the neckband.
My issue is that I am fast running out of yarn. It will be touch an go if I make it or not. The yarn is still available, so I can get more, it just wont be the some dyelot.
Watch this space to see the finished item and see if I make it with yarn or not.
This little number is for a male member of the family, and was started back in November. So far I have completed the back, the front, and one sleeve. The second sleeve is almost done, and then I just have to stitch the pieces together and do the neckband.
My issue is that I am fast running out of yarn. It will be touch an go if I make it or not. The yarn is still available, so I can get more, it just wont be the some dyelot.
Watch this space to see the finished item and see if I make it with yarn or not.
Monday, December 26, 2016
Another Christmas Bauble
My new Christmas bauble finally finished.
This Christmas bauble was started back in November in my local sewing group, the Georges Hall Sew'n'Sews. We had decided to cancel our December meeting due to the proximity of Christmas, and instead made our Christmas decorations in November.
This decoration is based on a polystyrene ball, available from places like Spotlight and Lincraft. It is divided into sections, cut with a stanley knife, then fabric is pushed into the cuts. I have made plenty of these over the years, so this year I took the basic idea to another level.
I first had to divide my polystyrene ball to obtain a pattern. From there I scanned my pattern into my digitising program to get the correct size to digitise my words. Once done, I could then play with the shapes of the letters to get them into the shape to fit the bauble.
My first attempt at stitching them out showed that I needed more of a border around the letters to accentuate them more, so back to the file I went to fix it up. Once fixed, I was happy with the stitch outs.
My ball is divided into six, three sections are my digitised words, and the alternate three sections are the same green fabric that has been over-layed with a red glittery mesh fabric. The ball has been finished of with red ribbon.
It's probably my favourite bauble on my tree this year, thought I do have other decorations that are not baubles that I like much better. Most of my tree decorations are hand made, this just adds another one to the mix.
This Christmas bauble was started back in November in my local sewing group, the Georges Hall Sew'n'Sews. We had decided to cancel our December meeting due to the proximity of Christmas, and instead made our Christmas decorations in November.
This decoration is based on a polystyrene ball, available from places like Spotlight and Lincraft. It is divided into sections, cut with a stanley knife, then fabric is pushed into the cuts. I have made plenty of these over the years, so this year I took the basic idea to another level.
I first had to divide my polystyrene ball to obtain a pattern. From there I scanned my pattern into my digitising program to get the correct size to digitise my words. Once done, I could then play with the shapes of the letters to get them into the shape to fit the bauble.
My first attempt at stitching them out showed that I needed more of a border around the letters to accentuate them more, so back to the file I went to fix it up. Once fixed, I was happy with the stitch outs.
My ball is divided into six, three sections are my digitised words, and the alternate three sections are the same green fabric that has been over-layed with a red glittery mesh fabric. The ball has been finished of with red ribbon.
It's probably my favourite bauble on my tree this year, thought I do have other decorations that are not baubles that I like much better. Most of my tree decorations are hand made, this just adds another one to the mix.
Sunday, December 25, 2016
Christmas Hearts
Wishing everyone reading a very Merry Christmas, and may the day bring you all peace, joy, love and great times with your family.
These little Christmas hearts have been made with love and given to close friends and special family members. I started them back in August, using a free pattern I found here.
I used scraps of even weave fabric that I had in my stash, as well a scraps of thread. They are backed in red felt to bring out the colour, and I even had that in my stash. The only thing I purchased was the ribbon to hang them.
They are made using the Hardanger technique, combined with some surface stitching which has been counted.
They should all be with their prospective new owners by now, and I know they will be treasured by one and all.
These little Christmas hearts have been made with love and given to close friends and special family members. I started them back in August, using a free pattern I found here.
I used scraps of even weave fabric that I had in my stash, as well a scraps of thread. They are backed in red felt to bring out the colour, and I even had that in my stash. The only thing I purchased was the ribbon to hang them.
They are made using the Hardanger technique, combined with some surface stitching which has been counted.
They should all be with their prospective new owners by now, and I know they will be treasured by one and all.
Saturday, December 10, 2016
Art Journal Pg 5
Page five of my numbered art journal is finished. I experimented with a few different things this time.
After the last two pages (where I washed them with a tea/coffee colour wash) bucked under the wetness and crinkled my pages, I purchased something called "Mod Podge" which was supposed to be a water based sealer/glue/finish.
So page number five has been firstly sealed with Mod Podge, then wet sponged with an aqua colour paint. After letting it dry, I worked with my trusty ball point pen and drew my number five. Mmmmm........ I could hardly see the line on the coloured background, so I went over it with a wedge tipped black marker.
From there I continued with the wedge tipped marker, and added in some basic shapes that continued on from the number five.
By this stage I felt that the page was getting very heavy and needed some lightness, so changed to a fine felt tipped pen to add in further patterning.
I quite like the page, it is a bit different for me using a wedge tipped marker on such a small scale. I usually like fine work in anything. Wedge tipped markers in this house are reserved for marking food items in the freezer . This time though I think it has added some dimension with the use of two different tipped markers as well as paint, and the page has certainly given me some inspiration for stitching.
After the last two pages (where I washed them with a tea/coffee colour wash) bucked under the wetness and crinkled my pages, I purchased something called "Mod Podge" which was supposed to be a water based sealer/glue/finish.
So page number five has been firstly sealed with Mod Podge, then wet sponged with an aqua colour paint. After letting it dry, I worked with my trusty ball point pen and drew my number five. Mmmmm........ I could hardly see the line on the coloured background, so I went over it with a wedge tipped black marker.
From there I continued with the wedge tipped marker, and added in some basic shapes that continued on from the number five.
By this stage I felt that the page was getting very heavy and needed some lightness, so changed to a fine felt tipped pen to add in further patterning.
I quite like the page, it is a bit different for me using a wedge tipped marker on such a small scale. I usually like fine work in anything. Wedge tipped markers in this house are reserved for marking food items in the freezer . This time though I think it has added some dimension with the use of two different tipped markers as well as paint, and the page has certainly given me some inspiration for stitching.
Tuesday, November 29, 2016
A Crimson Jumper
My new jumper is finished, it's actually been finished for a few weeks now. Made from a Crimson 'Savanah" yarn, which is a 70% wool, 30% alpaca yarn from Bendigo Wollen Mills.
It's way to hot to wear it now, summer is here, so it is packed away until next winter.
The pattern is one received free with my yarn order from Bendigo Woolen Mills. I loved the cable pattern, and found it really interesting to do. I have done cables before of course, but not interesting and multiple ones like this.
I changed the pattern slightly too, just making the sleeves a bit longer. In the pattern they were 3/4 length, which personally I find a silly length to be made in wool. It took a little juggling with numbers and multiple tries to get them right, but I am vary happy with the result.
I also have lots of yarn left over too, which will be enough to make a matching scarf or hat. So watch this space to see which design wins.
It's way to hot to wear it now, summer is here, so it is packed away until next winter.
The pattern is one received free with my yarn order from Bendigo Woolen Mills. I loved the cable pattern, and found it really interesting to do. I have done cables before of course, but not interesting and multiple ones like this.
I changed the pattern slightly too, just making the sleeves a bit longer. In the pattern they were 3/4 length, which personally I find a silly length to be made in wool. It took a little juggling with numbers and multiple tries to get them right, but I am vary happy with the result.
I also have lots of yarn left over too, which will be enough to make a matching scarf or hat. So watch this space to see which design wins.
Wednesday, November 23, 2016
Art Journal Pg 4
My art journal continues, if somewhat slowly. I have been a bit slack with the ten minutes a day thing, but I do try when ever I have time, or manage to think about it.
This is page four, which lives opposite page three. It is coloured with the same tea/coffee wash that I used on page three. I actually colour washed the pages at the same time so they would be ready when I was.
This page continued on with the drawing of some seed heads, as well as some words and some patterning. I find that I like making patterns the best, and as yet am still using just a ball point pen.
Now I have started with the number thing, I think I will continue with it. It gives me a starting point each time.
The other thing I have found is the ten minutes a day thing can very easily stretch out into 30 minutes as I get lost in this mark making world. Just as I get lost in my stitching world, I end up in some other place for a short time, escaping reality, and creating inspiration for my future stitching.
Friday, November 04, 2016
Art Journal Pg 3
I have been continuing to use pen work in my journal every day, only a few minutes mind you, but still every day.This is my page three.
This page started with a wash of tea and coffee dregs. Somewhere I had read about using coffee washes on paper, why not? I had tea washed fabric before, why not paper? So when making my first cuppa for the day, I placed the sodden tea bag in a bowl. My plan was to drag it over the page, but them I spied the coffee pot from the previous night which still had to be emptied. I emptied it in with the tea bag. This gave me a dirty coloured cold liquid with which I could paint.
When the page was dry, I did notice that the page had gone crinkly (as paper does when it's been wet), but also some of the colour had seeped through to the other side of the page. This is the colour that showed on my page two. Note to self, read how to avoid this.
As I had started with putting numbers on my pages, I thought that the best idea was to continue, so number three became a reality, just a single line at first. Then came the parsley seed head. It had been calling out to me to draw it for some time, so I did. Then I added the word 'Parsley' following the curve of the number three. Form there the page took on a life of it's own.
I am finding it interesting that a page of doodling can have a life of it's own, and that 'things' cry out to be drawn. Just like my stitching really. My stitching talks to me quite often and tells me what it needs, these pages are doing the same. Must be just part of the same creative process.
My page four has been started, I wonder where that will lead.
This page started with a wash of tea and coffee dregs. Somewhere I had read about using coffee washes on paper, why not? I had tea washed fabric before, why not paper? So when making my first cuppa for the day, I placed the sodden tea bag in a bowl. My plan was to drag it over the page, but them I spied the coffee pot from the previous night which still had to be emptied. I emptied it in with the tea bag. This gave me a dirty coloured cold liquid with which I could paint.
When the page was dry, I did notice that the page had gone crinkly (as paper does when it's been wet), but also some of the colour had seeped through to the other side of the page. This is the colour that showed on my page two. Note to self, read how to avoid this.
As I had started with putting numbers on my pages, I thought that the best idea was to continue, so number three became a reality, just a single line at first. Then came the parsley seed head. It had been calling out to me to draw it for some time, so I did. Then I added the word 'Parsley' following the curve of the number three. Form there the page took on a life of it's own.
I am finding it interesting that a page of doodling can have a life of it's own, and that 'things' cry out to be drawn. Just like my stitching really. My stitching talks to me quite often and tells me what it needs, these pages are doing the same. Must be just part of the same creative process.
My page four has been started, I wonder where that will lead.
Friday, October 28, 2016
Knitting
I have been knitting a lot lately. This one is a new jumper for me. It's not finished yet, but it is well into the process.
The pattern is one I chose for free with an order of yarn from Bendigo Woolen Mills. It says in the pattern to make the front and back the same. Mmmmm........ if I did that, I would have pattern up the left side of my front, and on the opposite side on the back when it was complete. I chose to play with the stitch numbers and make the patterns sit on opposite sides as it was being knitted, this way the patterns will meet together at the shoulder on the left side when completed.
It is being knitted in crimson "Savannah" yarn, an 8ply 70% wool, 30% alpaca yarn from Bendigo Woolen Mills. The cable is a different one too. I have done cables before, but not quite as interesting as this one.
So far I have completed the back and the front, and two thirds of one sleeve. The sleeve in the pattern in 3/4 length, which to me is useless in an 8ply wool jumper. If I am going to wear wool, I want all of my arms to be warm too. So I played with the pattern numbers again to make the sleeve longer. My first attempt was not successful, it was too tight, so I un-pulled it all (the sleeve) and did it again. My second attempt is much better in fit, and I am nearly finished sleeve number one. Then I just have to make sleeve number two, sew it together, make the neckband and I will be done. A new jumper for me ready for next winter.
The pattern is one I chose for free with an order of yarn from Bendigo Woolen Mills. It says in the pattern to make the front and back the same. Mmmmm........ if I did that, I would have pattern up the left side of my front, and on the opposite side on the back when it was complete. I chose to play with the stitch numbers and make the patterns sit on opposite sides as it was being knitted, this way the patterns will meet together at the shoulder on the left side when completed.
It is being knitted in crimson "Savannah" yarn, an 8ply 70% wool, 30% alpaca yarn from Bendigo Woolen Mills. The cable is a different one too. I have done cables before, but not quite as interesting as this one.
So far I have completed the back and the front, and two thirds of one sleeve. The sleeve in the pattern in 3/4 length, which to me is useless in an 8ply wool jumper. If I am going to wear wool, I want all of my arms to be warm too. So I played with the pattern numbers again to make the sleeve longer. My first attempt was not successful, it was too tight, so I un-pulled it all (the sleeve) and did it again. My second attempt is much better in fit, and I am nearly finished sleeve number one. Then I just have to make sleeve number two, sew it together, make the neckband and I will be done. A new jumper for me ready for next winter.
Friday, October 21, 2016
Art Journal Page 2
My journey into this art journaling world is continuing. Most mornings I am putting aside a minimum of ten minutes, while I savour my first morning cuppa and listen to the news of the day. I find though that the ten minutes goes really fast and I want to continue, which of course I do. It is easy to get lost in this world for twenty minutes at a time, and like my stitching, it takes me to another place.
I have found once a page is started, I can usually add something to it. In this case, the journal has been started, so it is easy to make that next page.
I did start this journal with page one, drawing a number one on the page and leaving it blank. At the time I marked a number two on the next page, and that has been my starting point for my second page. For the most part, I have left it blank also, except for one tiny part where I stuffed up. Well, not stuffed up really, I just made a mark where I wasn't planning to. This is where I learned that there are no mistakes, I just had to work around it.
I had divided this page off into sections too, the same as I did for page one. Though this time the sections were more curved, where on page one they were more square.
In some of the reading I have been doing, it says to 'follow your heart', and to a certain extent this is happening. My stitching talks to me and tells me what it needs, and now these pages are doing the same. There are also 'things' that I spot that just call me and ask me to draw them. This is what I am finding really interesting.
On this page the leaves called to me, especially the flat leaf parsley that grows in the garden under the clothes line. It's hard to spot now because the page is so filled in, but it is there. Then came the other leaves, the ivy geranium, the gum, the begonia,and the thistle.
The other thing that calls to me is lace, and wanting to design my own, so there are scalloped edges and curved lines and picot edges in this page as well.
There is also a slight hint of colour. This has actually come from the next page which is painted. The 'paint' has actually seeped through the page, not that I mind of course, it adds to the feel of the page. I have bought a product which I plan to use on all future painted pages, to maybe stop this from happening and maybe help strengthen the pages. But more on that next time.
So far I am enjoying this journey. It is my new journey, and I am learning to follow my heart just like I do with my stitching.
Thursday, October 13, 2016
Another Baby Shawl
Way back earlier this year I was surprised with a comment that I was going to be Great Auntie again. What great news! I did ask what the Mum-to-be would like for this new baby and was told that everything was needed, everything had been given away.
That was when I decided to make her a baby banklet. So I dug through and found my shawl book. Would I do another circular one? Nah..... I would do something a little easier..... or so I thought. A square one with a pretty lace edge.
This time I ordered through Bendigo Woollen Mills. Everyone always raved over their yarn, and I was informed it was much cheaper. In the end it was about half the price and only a few days to arrive.
The center of the shawl was an easy pattern, and finished in only a few weeks. It was the lace edge that got me. I very rarely give up on anything, but I gave up on this edge. After unpicking numerous times, and making mistakes in different places each time, I decided I was running out of time and needed to do something else. The hunt for another edge pattern was on.
I hunted both on-line, and in my local library. Surprising enough, the library had nothing, and I ended up using an edge pattern that I found for free on-line that dated back to the 1800's.
This edge pattern was patterned on every row, not just the knit rows like I am used to. The previous lace pattern that I gave up on was also patterned on each row, and I thought this was the reason I kept making mistakes. The second pattern though had a more distinct pattern through it than the first, so this made it easier to do.
Like anything found for free on-line, there is always a problem. The problem with this pattern was there were no corners , so I had to make one up. I would have liked to have continued the pattern, but to do that I would have had to miter it, and this would take some thinking, and time to experiment which I was running out of fast. So I experimented with short rows and keeping the outer edge going. It was simple, but worked.
I loved the final effect, and I believe the new owner does too. It is a one of a kind baby blanket that hopefully will be loved for many years to come.
That was when I decided to make her a baby banklet. So I dug through and found my shawl book. Would I do another circular one? Nah..... I would do something a little easier..... or so I thought. A square one with a pretty lace edge.
This time I ordered through Bendigo Woollen Mills. Everyone always raved over their yarn, and I was informed it was much cheaper. In the end it was about half the price and only a few days to arrive.
The center of the shawl was an easy pattern, and finished in only a few weeks. It was the lace edge that got me. I very rarely give up on anything, but I gave up on this edge. After unpicking numerous times, and making mistakes in different places each time, I decided I was running out of time and needed to do something else. The hunt for another edge pattern was on.
I hunted both on-line, and in my local library. Surprising enough, the library had nothing, and I ended up using an edge pattern that I found for free on-line that dated back to the 1800's.
This edge pattern was patterned on every row, not just the knit rows like I am used to. The previous lace pattern that I gave up on was also patterned on each row, and I thought this was the reason I kept making mistakes. The second pattern though had a more distinct pattern through it than the first, so this made it easier to do.
Like anything found for free on-line, there is always a problem. The problem with this pattern was there were no corners , so I had to make one up. I would have liked to have continued the pattern, but to do that I would have had to miter it, and this would take some thinking, and time to experiment which I was running out of fast. So I experimented with short rows and keeping the outer edge going. It was simple, but worked.
I loved the final effect, and I believe the new owner does too. It is a one of a kind baby blanket that hopefully will be loved for many years to come.
Tuesday, October 11, 2016
Art Journal Page One
About a month ago, I was inspired to enter the art journaling world, the beginnings of which can be read here. Since then, I have completed a whole page, a first for me with just my own 'drawings'.
I had read about being intimidated by that first blank page, and that was so true. All the articles I read said to prepare and paint a page. Mmmmmmm............. that would mean getting out paints, brushes, water jars, table protectors etc etc. Did I want to do that? Nah............ So I didn't.
I had also been reading about materials to use, which gave great long lists of things, some of which I had, some of which I didn't. Then I read about the fact that art journaling could be done with just a few simple things such as one piece of paper and a pen. Well, I certainly had that, my little spiral backed sketch book, and a black ball point pen. Yep, that's all I used.
So where did I start? Staring at that very first blank white page sure was intimidating! What to do? So I began thinking about my day and what I had done that I had enjoyed. My phone call to my friend came to mind, which then led me to numbers, after all I needed numbers to call her. So I began at number one, this was after all my first page.
I drew a number one on the page, quite large to hopefully fill the space. What now? I just kept continuing some of the lines from the corners out to the edge of the page, still keeping that number one intact. This then gave me other areas to do things with, some got sectioned off further, some got left as they were. They were little individual spaces that I could fill with what I wanted.
It's taken me over a week to fill this page. Each time I have taken something that has happened in my day and put it into lines to fill a small space. I could be anything from pruning roses, hanging out washing, attending a wedding, or cutting bad spots out of potatoes. Who says our days can't be inspiring?
So I feel the page is now complete, and I have moved onto page two. Would I use this page for anything other than to look at? Absolutely! I have already had view finders out on it and imagined slices cut from it. They would have to be enlarged of course, but they are definitely usable for an original piece of textile creativity. Watch this space!
I had read about being intimidated by that first blank page, and that was so true. All the articles I read said to prepare and paint a page. Mmmmmmm............. that would mean getting out paints, brushes, water jars, table protectors etc etc. Did I want to do that? Nah............ So I didn't.
I had also been reading about materials to use, which gave great long lists of things, some of which I had, some of which I didn't. Then I read about the fact that art journaling could be done with just a few simple things such as one piece of paper and a pen. Well, I certainly had that, my little spiral backed sketch book, and a black ball point pen. Yep, that's all I used.
So where did I start? Staring at that very first blank white page sure was intimidating! What to do? So I began thinking about my day and what I had done that I had enjoyed. My phone call to my friend came to mind, which then led me to numbers, after all I needed numbers to call her. So I began at number one, this was after all my first page.
I drew a number one on the page, quite large to hopefully fill the space. What now? I just kept continuing some of the lines from the corners out to the edge of the page, still keeping that number one intact. This then gave me other areas to do things with, some got sectioned off further, some got left as they were. They were little individual spaces that I could fill with what I wanted.
It's taken me over a week to fill this page. Each time I have taken something that has happened in my day and put it into lines to fill a small space. I could be anything from pruning roses, hanging out washing, attending a wedding, or cutting bad spots out of potatoes. Who says our days can't be inspiring?
So I feel the page is now complete, and I have moved onto page two. Would I use this page for anything other than to look at? Absolutely! I have already had view finders out on it and imagined slices cut from it. They would have to be enlarged of course, but they are definitely usable for an original piece of textile creativity. Watch this space!
Friday, September 30, 2016
Art Journals
From what I understand , an art journal can be anything you want it to be. A place to sketch, paint, paste, colour, draw, write, in fact anything creative on paper.
I have been working on visual diaries now for some years, and have quite a few. So how is an art journal different from a visual diary? In fact, I think my pile of visual diaries meet the description of an art journal. I have drawn, pasted, written, and in a few cases coloured. These diaries are my inspiration now for all my stitching.
Possibly the difference between an art journal and my visual diaries might be the 'artistic view'. My visual diaries are quick sketches of things that inspire me, with simple notes written with arrows to help explain what I mean. Sometimes there may be pages from magazines stuck in, which could be anything that may inspire me. It could be a photograph from a travel magazine, a cut section from an advertising leaflet, a cut section from a textile magazine. I even have visual diaries now for specific things. I have one especially for lace, one for drawn thread work, and one especially for any kind of machine sewing, like possible applique or garment construction. My visual diaries may not be pretty to look at, and my not have pages that could be hung on a wall, but they are full of inspiration.
In my reading over the last few days, one of the things I found was that starting was the biggest issue, and staring at that blank white page becomes intimidating. It sure does, but looking around at our surroundings or thinking about our day and what we have done gives us plenty of inspiration. We just have to make a mark on paper. How many times have I been told that over the years?
So why start an art journal rather than a visual diary? In my case I want to explore my creative talent in a different form. I am so comfortable with playing with fabric, needles and thread, now I am going to see how far I can go into the paper/ art world, and yes it is uncomfortable. Sure, I have played with paper and paint before, but I always come back to textiles. It is after all in my blood.
I invite you all to follow me in this journey to see how far I go. At the moment I am just playing with a black ball point pen and white paper. Hopefully I may get the courage to delve deeper with paint, other papers and colour in it's many forms. The above pic is page one of my new art journal. let's see how many more I can create and how I grow.
Friday, September 02, 2016
A Fill In Bookmark
I have been working on another major project lately which requires twelve little finished pieces, so I have been using up my linen scraps. Sorry, you will all have to wait a while to see that project. One of the scraps was big enough to get two of my finished pieces, but not four. I could have got three, but that would have left me with one tiny scrap of linen left which would not have been much good for anything. So I decided to work two, and use the bigger scrap left to make a bookmark.
A book mark , well then I had to make some decisions as to how to work the book mark, what colour, etc etc. What better way than to Google some bookmarks to get some inspiration. I did think of some blackwork patterns, but worked in colour of course, but decided on a Hardanger one instead. Then it was a look in my stash of threads to see what colours I had that I could use.
The dark green was my first pick, a Perle 8, then I found the variegated one , also a Perle 8, but I needed a Perle 12 to do the eyelets and needle weaving. I found some leftover in a smokey blue that I had hand dyed, and previously used with this same variegated one. All set, I was ready to stitch.
All was going well, but as the base fabric linen was white, it needed to be toned down. so I decided to fill in the background. I tried a four sided stitch over four threads, but quickly pulled that out. Then I tried a four sided stitch over two threads. Still not real happy, but I left it there. Possibly would have been better with something diagonal. It certainly toned down the white. I worked this background in a pale green stranded thread. I used the same green to work the eyelets.
Then we came to the needle weaving. I worked two bars in that smokey blue before I quickly pulled it out. It was way to dark and heavy, and looked all wrong. I thought a yellow would be nice, but me have yellow in the house? A yellow Perle 12 thread as well? Not likely! I didn't even have much in the way of yellow stranded thread, nothing suitable any way.
In the end I just used the same pale green stranded thread I used in the background to work the needle weaving and Dove's Eyes filling. Stranded thread is a **** to use for needle weaving, but I did manage it and it looks OK. A tassel in the same dark green that I used for the hem, just finished it.
It may not win any prizes, but I have used up some scraps, entertained my self for a while, and now have something that I can use.
A book mark , well then I had to make some decisions as to how to work the book mark, what colour, etc etc. What better way than to Google some bookmarks to get some inspiration. I did think of some blackwork patterns, but worked in colour of course, but decided on a Hardanger one instead. Then it was a look in my stash of threads to see what colours I had that I could use.
The dark green was my first pick, a Perle 8, then I found the variegated one , also a Perle 8, but I needed a Perle 12 to do the eyelets and needle weaving. I found some leftover in a smokey blue that I had hand dyed, and previously used with this same variegated one. All set, I was ready to stitch.
All was going well, but as the base fabric linen was white, it needed to be toned down. so I decided to fill in the background. I tried a four sided stitch over four threads, but quickly pulled that out. Then I tried a four sided stitch over two threads. Still not real happy, but I left it there. Possibly would have been better with something diagonal. It certainly toned down the white. I worked this background in a pale green stranded thread. I used the same green to work the eyelets.
Then we came to the needle weaving. I worked two bars in that smokey blue before I quickly pulled it out. It was way to dark and heavy, and looked all wrong. I thought a yellow would be nice, but me have yellow in the house? A yellow Perle 12 thread as well? Not likely! I didn't even have much in the way of yellow stranded thread, nothing suitable any way.
In the end I just used the same pale green stranded thread I used in the background to work the needle weaving and Dove's Eyes filling. Stranded thread is a **** to use for needle weaving, but I did manage it and it looks OK. A tassel in the same dark green that I used for the hem, just finished it.
It may not win any prizes, but I have used up some scraps, entertained my self for a while, and now have something that I can use.
Friday, August 26, 2016
Two Inch Squares
Hello there! Yes I am back. It may have been a while since I have been here, but there has certainly been some creating going on the background. I just couldn't show some of it until today.
These are my version of a two inch square. Nine of them in all. Two inch squares was the theme this year of one of my stitching groups. We could stitch what and how we liked, the only stipulation was the finished size had to be two inches square.
At first I took a while to think what I would do, then it dawned on me that I always wanted to try square Teneriffe Lace, so I did.
It was easy to make up my little square pad, then I collected together some scraps of Perle 8 thread from my stash and started to play. The first attempts are the pink, blue and cream squares. The last of these was the square on the top left, and I just loved the pattern that it created. So all my squares after that were in the same pattern, just different colour combinations.
I want to make a few more of these squares using the same pattern, and mixing the colours up. I have a project in mind that I want to use them on and I will need fifteen of them in all, so I have a few more to do still.
For the moment, these little squares, along with others that my stitching friends have done, are all on exhibition until this Sunday. The exhibition is being held at The Masonic Hall, 315 Concord Rd, Concord West, here in Sydney. It is open from 10am - 3pm today, tomorrow ( Saturday) and Sunday. So be quick if you want to see them.
I have other things to show you all too, but not just yet. I am waiting for a few things to happen first.
At first I took a while to think what I would do, then it dawned on me that I always wanted to try square Teneriffe Lace, so I did.
It was easy to make up my little square pad, then I collected together some scraps of Perle 8 thread from my stash and started to play. The first attempts are the pink, blue and cream squares. The last of these was the square on the top left, and I just loved the pattern that it created. So all my squares after that were in the same pattern, just different colour combinations.
I want to make a few more of these squares using the same pattern, and mixing the colours up. I have a project in mind that I want to use them on and I will need fifteen of them in all, so I have a few more to do still.
For the moment, these little squares, along with others that my stitching friends have done, are all on exhibition until this Sunday. The exhibition is being held at The Masonic Hall, 315 Concord Rd, Concord West, here in Sydney. It is open from 10am - 3pm today, tomorrow ( Saturday) and Sunday. So be quick if you want to see them.
I have other things to show you all too, but not just yet. I am waiting for a few things to happen first.
Friday, April 29, 2016
Digitized Machine Embroidered Multihooped Scallops
Behold! My first project that involved multi hooping!
I have wanted to know about multi hooping for a while. What is multi hooping you ask? It is where a whole machine embroidery design has to be hooped more than once to achieve the final result. The trick is getting it to join smoothly and without the join being noticed.
Then one day I discovered a new canvas in my upgraded digitizing program. It was a hooping canvas. Previously, I had only had an artwork canvas and an embroidery canvas, now I had a hooping canvas as well. I decided to play, and the only thing to play with was a big design that needed multiple hoopings.
I had asked a lady I know who is very good at digitizing. All I knew was that there were registration points for matching purposes, but I didn't know how or where to put them. The only clue that A---- had given me was to start small, and had suggested to start with a flower that need a long stem. Mmmmm.......... what would I put a flower on? So I go thinking, what else could I do that would need a long line, take little matching, and that could be used if it worked? So my scallops were born.
I started looking through my files to see what scallops I had. I did have one, but it was too small for what I wanted, so I set about digitizing a bigger one. I was going to stitch them out onto white fabric, cut the excess fabric away then use them as a trim of a bag. Sort of like a lace trim inserted between two pieces of fabric. They didn't need to be too strong just for a trim, but I still wanted them strong. So there are two different underlays under the scallop, as well as interfacing ironed onto the fabric. Hopefully this will be strong enough so the scallops wont stretch, or tear at the points.
The program automatically made them with the stitch angle at 45 deg. This was not good so it needed to be changed. I put it at 90 deg, It was fine at tip of the scallop, but did not look good at the points. I had discovered an 'add stitch angles' button which I decided to play with. I am sure I had it before the upgrade, but had never used it. It came in good use now. I inserted multiple stitch angles into my scallops to be at 0 deg at the points, and 90 deg at the tip of the curve. This made the stitches curve beautifully around the scallop.
OK, so scallop done, it now needed to repeated so it stitched out in a smooth stitching sequence. Time to adjust start and end points before repeating. In all, I repeated the scallop so I had a line about 19 inches, that's nearly 50 cm in length. A length that I could use, and definitely had to be multi hooped.
In the hooping canvas, I learnt how to position hoops, add hoops, add splitting guides and a lot more that in reality I didn't need. It certainly was a learning curve. According to the program, I had one splitting guide, and two hoopings, but when I came to stitch it out, the machine told me that the design was too big for the hoop. Mmmmm........ not according to the program. This is where I found out that I could change the hoop size, and when I put in the hoop size that I had on the machine, I now had three hoopings!
OK, so now I was about to start stitching out this design. I had searched on line for resources on multi hooping, and read tutorials and watched You-tube videos. One of the tutorials said to use sticky backed stabilizer. I had seen it, but never used it. Could I buy it? Yes I could, but I chose not to. Instead I used my trusty tear-away. Lesson leaned, not a good choice.
The program had split the file into three different parts. I had to stitch part 1, re-hoop, match up registration points, then stitch part 2. Part 1 had registration points in the stitch out, and I was supposed to match the registration points in Part 2 to those in Part 1. The problem was that because I had used a tear-away stabilizer, it tore at the registration points! I tried to match them up when stitching out Part 2, but of course I was out and things didn't match. Mmm....... lesson learnt. I was out by about 2 mm, not a huge amount, and my scallops overlapped so at least it was still usable.
When I came to stitch out Part 3, I didn't even use the registration points, I just moved the design on-screen and matched the start point of part 3 with the end point of Part 2. Perfection!
That's when I decided to stitch another line of scallops, the could be used on the other side of the bag. I have trimmed them now, and they are ready to trim my new bag.
OK, so my first try at multi-hooping was a huge lesson. I have learned heaps. Would I do it again? Absolutely! So watch this space for more multi hooping adventures and of course my finished bag trimmed with my own stitched out scallops.
I have wanted to know about multi hooping for a while. What is multi hooping you ask? It is where a whole machine embroidery design has to be hooped more than once to achieve the final result. The trick is getting it to join smoothly and without the join being noticed.
Then one day I discovered a new canvas in my upgraded digitizing program. It was a hooping canvas. Previously, I had only had an artwork canvas and an embroidery canvas, now I had a hooping canvas as well. I decided to play, and the only thing to play with was a big design that needed multiple hoopings.
I had asked a lady I know who is very good at digitizing. All I knew was that there were registration points for matching purposes, but I didn't know how or where to put them. The only clue that A---- had given me was to start small, and had suggested to start with a flower that need a long stem. Mmmmm.......... what would I put a flower on? So I go thinking, what else could I do that would need a long line, take little matching, and that could be used if it worked? So my scallops were born.
I started looking through my files to see what scallops I had. I did have one, but it was too small for what I wanted, so I set about digitizing a bigger one. I was going to stitch them out onto white fabric, cut the excess fabric away then use them as a trim of a bag. Sort of like a lace trim inserted between two pieces of fabric. They didn't need to be too strong just for a trim, but I still wanted them strong. So there are two different underlays under the scallop, as well as interfacing ironed onto the fabric. Hopefully this will be strong enough so the scallops wont stretch, or tear at the points.
The program automatically made them with the stitch angle at 45 deg. This was not good so it needed to be changed. I put it at 90 deg, It was fine at tip of the scallop, but did not look good at the points. I had discovered an 'add stitch angles' button which I decided to play with. I am sure I had it before the upgrade, but had never used it. It came in good use now. I inserted multiple stitch angles into my scallops to be at 0 deg at the points, and 90 deg at the tip of the curve. This made the stitches curve beautifully around the scallop.
OK, so scallop done, it now needed to repeated so it stitched out in a smooth stitching sequence. Time to adjust start and end points before repeating. In all, I repeated the scallop so I had a line about 19 inches, that's nearly 50 cm in length. A length that I could use, and definitely had to be multi hooped.
In the hooping canvas, I learnt how to position hoops, add hoops, add splitting guides and a lot more that in reality I didn't need. It certainly was a learning curve. According to the program, I had one splitting guide, and two hoopings, but when I came to stitch it out, the machine told me that the design was too big for the hoop. Mmmmm........ not according to the program. This is where I found out that I could change the hoop size, and when I put in the hoop size that I had on the machine, I now had three hoopings!
OK, so now I was about to start stitching out this design. I had searched on line for resources on multi hooping, and read tutorials and watched You-tube videos. One of the tutorials said to use sticky backed stabilizer. I had seen it, but never used it. Could I buy it? Yes I could, but I chose not to. Instead I used my trusty tear-away. Lesson leaned, not a good choice.
The program had split the file into three different parts. I had to stitch part 1, re-hoop, match up registration points, then stitch part 2. Part 1 had registration points in the stitch out, and I was supposed to match the registration points in Part 2 to those in Part 1. The problem was that because I had used a tear-away stabilizer, it tore at the registration points! I tried to match them up when stitching out Part 2, but of course I was out and things didn't match. Mmm....... lesson learnt. I was out by about 2 mm, not a huge amount, and my scallops overlapped so at least it was still usable.
When I came to stitch out Part 3, I didn't even use the registration points, I just moved the design on-screen and matched the start point of part 3 with the end point of Part 2. Perfection!
That's when I decided to stitch another line of scallops, the could be used on the other side of the bag. I have trimmed them now, and they are ready to trim my new bag.
OK, so my first try at multi-hooping was a huge lesson. I have learned heaps. Would I do it again? Absolutely! So watch this space for more multi hooping adventures and of course my finished bag trimmed with my own stitched out scallops.
Sunday, April 17, 2016
Grace's Garden
The tiny coloured squares were produced by cutting strips, sewing the strips together in an order, then cross cutting. This produced a strip of coloured squares separated by white ones.
Overall, the quilt was planned in my quilting program, which is attached to my digitizing program. I could insert fabrics, work out the size of the strips to cut, and have a virtual vision of what the finished quilt would look like.
As I worked on it, the quilt started to talk to me as to how I would quilt it. The flowers won out. Stitched in pink, they were stitched through paper on which I had drawn the design. The paper was then easy to tear away. The sashings were ditch stitched.
The label took nearly as much time to do as the quilt itself. It has been digitized, and I wanted to continue the flower theme into the label. It was these flowers that took the time. I wanted them to 'radiate', and this meant learning about the 'star fill' feature in my digitizing program. In the meantime, my PC crashed and I had to sit patiently and wait for it to be fixed.
The PC is all fixed now, the quilt is finished, and has been gifted. Hopefully the new owner will get plenty of warm cuddles from it over many years to come.
Friday, February 12, 2016
A Mother of the Bride Dress
After some discussions recently on an on-line sewing group I am in, I realized I hadn't shown you all the Mother of the Bride dress that I made towards the end of the last year.
This lady was supposed to make it herself, but she was running out of time and asked me to do it. She had already bought the pattern and the fabric, so what could be so hard?
Mmmmmm............. The fabric was sequinned, something I hadn't really sewn with before, and the pattern, well don't get me started on that! It had seven, yes seven, horizontal seams in the skirt alone, then more in the bodice! The idea was that parts of the dress were left sheer, and the way this was achieved was to cut the fabric, and back only parts with lining. Mmmmmm.......... this might work on some fabrics, and be very pretty too, but not on this lovely sequinned fabric.
My first thought was to reverse engineer the pattern back to a basic shape to reduce the number of seams. This proved to be a nightmare, and I thought it would be easier to pattern make it from scratch, so I did. After many discussions with the client, we took out all the horizontal seams, and put in panel lines. The original shape was kept and the panel lines let me control the fitting, as well as give her the flare on the skirt that she wanted.
OK, so pattern done, toile fitting well, the lining was made and fitted well. I proceeded to lay the patterns out carefully on the lace, only to find it was a one way design and needed to be cut singly. I had made 1/2 patterns that are used when we cut things on a fold or mirror, so now I needed to make double patterns to make sure there was enough fabric.
I had assumed there was enough fabric, and when I placed all the patterns out, I was missing one panel! I tried placing them down the length of the fabric as well as across the fabric, and still there was not enough fabric!This was not possible! The mother of the bride could not go to her daughters wedding with one panel missing from her dress! OK, so I needed to find a solution.
Solution 1 - buy more fabric. Fabric stores that sell this type of fabric will not sell just 30 cms more. Besides, the client had bought all the shop had.
Solution 2 - reduce the flare. This helped a little, but not enough.
Solution 3 - make it shorter. At the clients request, I had made the length 15 cm longer than the original pattern, so I started folding up all the hems by 10 cms, and yes, it made a difference! I could cut all the pieces!
Remind me not to sew with sequins again. Once I cut into the fabric, I had sequins everywhere!
I had been told to cut all the sequins from the seam allowances before sewing, so I tested a sample with my nail scissors and started snipping. What a tedious job! The sequins were so small! So I tested a sample just sewing a seam without removing the sequins. It worked without an issue.
The dress only had two layers, the lace and the lining. That was all the client wanted. That only left me with binding the armholes and the neckline as a finish. I had planned to bind the seams of the lace with organza as well, but this actually looked awful so they just got over locked, it looked so much better. I had been panicking about the hem, and in the end I faced it with the organza.
Overall I was happy with the final effect, but not as happy as the client. She was over the moon. Would I make another sequinned dress again? Probably, especially if the client would pay me more. My thanks must go out to Christine M for all the help and advice she gave me over the phone.
This lady was supposed to make it herself, but she was running out of time and asked me to do it. She had already bought the pattern and the fabric, so what could be so hard?
Mmmmmm............. The fabric was sequinned, something I hadn't really sewn with before, and the pattern, well don't get me started on that! It had seven, yes seven, horizontal seams in the skirt alone, then more in the bodice! The idea was that parts of the dress were left sheer, and the way this was achieved was to cut the fabric, and back only parts with lining. Mmmmmm.......... this might work on some fabrics, and be very pretty too, but not on this lovely sequinned fabric.
My first thought was to reverse engineer the pattern back to a basic shape to reduce the number of seams. This proved to be a nightmare, and I thought it would be easier to pattern make it from scratch, so I did. After many discussions with the client, we took out all the horizontal seams, and put in panel lines. The original shape was kept and the panel lines let me control the fitting, as well as give her the flare on the skirt that she wanted.
OK, so pattern done, toile fitting well, the lining was made and fitted well. I proceeded to lay the patterns out carefully on the lace, only to find it was a one way design and needed to be cut singly. I had made 1/2 patterns that are used when we cut things on a fold or mirror, so now I needed to make double patterns to make sure there was enough fabric.
I had assumed there was enough fabric, and when I placed all the patterns out, I was missing one panel! I tried placing them down the length of the fabric as well as across the fabric, and still there was not enough fabric!This was not possible! The mother of the bride could not go to her daughters wedding with one panel missing from her dress! OK, so I needed to find a solution.
Solution 1 - buy more fabric. Fabric stores that sell this type of fabric will not sell just 30 cms more. Besides, the client had bought all the shop had.
Solution 2 - reduce the flare. This helped a little, but not enough.
Solution 3 - make it shorter. At the clients request, I had made the length 15 cm longer than the original pattern, so I started folding up all the hems by 10 cms, and yes, it made a difference! I could cut all the pieces!
Remind me not to sew with sequins again. Once I cut into the fabric, I had sequins everywhere!
I had been told to cut all the sequins from the seam allowances before sewing, so I tested a sample with my nail scissors and started snipping. What a tedious job! The sequins were so small! So I tested a sample just sewing a seam without removing the sequins. It worked without an issue.
The dress only had two layers, the lace and the lining. That was all the client wanted. That only left me with binding the armholes and the neckline as a finish. I had planned to bind the seams of the lace with organza as well, but this actually looked awful so they just got over locked, it looked so much better. I had been panicking about the hem, and in the end I faced it with the organza.
Overall I was happy with the final effect, but not as happy as the client. She was over the moon. Would I make another sequinned dress again? Probably, especially if the client would pay me more. My thanks must go out to Christine M for all the help and advice she gave me over the phone.
Tuesday, January 12, 2016
A New Work Bag
Behold, my new work bag!
This bag was born out of my local sewing group. One of the ladies had so much fabric she decided to cut up a huge pile into squares, and the members of the group could piece together colours of their choice into a bag. At group day, I chose my pieces, and got them all sewn together but one seam. It them came home and sat on my sewing table. I had one brainwave that my bobbin lace fish could adorn this bag, so set out stitching him onto one blank square, then promptly left the bag rolled up, unfinished, in another bag, on my sewing table. I found it again in my clean up last week, so decided to finish it.
It only needed one seam to sew, lining, quilting, a bind and some handles. The lining was scraps, donated by the lady who cut the squares. There was enough of it, it just needed to be be joined to make a piece large enough. The batting was scraps left over from other quilts that I had made. Once again joined to make a piece big enough for what I wanted.
So I made my quilt sandwich - backing, batting and bag outer, and pinned it all together. I even checked that my fish was in the best place for viewing. Then I decided to have a play with the quilting and do something I had not done before. Because I had added my bobbin lace fish, I thought it might be fun to quilt fish shapes and waves on the bag. I had quilted plenty of straight lines, shadow quilting, and stitching in the ditch, but stitching shapes and other lines like this was something new. I had tried once before and outlined the marks on a quilt in pencil. As a dressmaker I should have known better because the pencil has never washed out, and as a result I have stayed away from free form quilting. This time I traced the fish shapes and waves into a tear-a-way, and quilted through that. Wallah! Fish shapes and waves and no pencil markings! Why didn't I think of this before?
I was on a roll, and my bag was looking good, until I started to join it together into the bag shape. My bobbin lace fish that had taken sooooooooo long to do, was sitting at the bottom! I nearly cried! He couldn't stay there, he would wear, so he had to be moved. But how? All his working ends had been taken back through the green fabric and finished off. There were dozens of them, so he was not moving from that piece of fabric. The only choice was to move the square, but that meant unpicking quilting! So that's what I did, unpicked the quilting, swapped two squares around, then re-did the quilting. Sounds easy right? Took me a while, but I got there and my fish can now be viewed well and is safe from wear.
The bag was formed, seams on the inside bound, once again out of scraps. Then I made my handles, once again out of scraps. They contain slotted waist banding for strength and ease of making, and a layer of batting for some padding.
All in all I am happy with my new work bag, and will use it with pride. Amazing what can be made from other peoples unwanted fabric and one's own stash of scraps.
This bag was born out of my local sewing group. One of the ladies had so much fabric she decided to cut up a huge pile into squares, and the members of the group could piece together colours of their choice into a bag. At group day, I chose my pieces, and got them all sewn together but one seam. It them came home and sat on my sewing table. I had one brainwave that my bobbin lace fish could adorn this bag, so set out stitching him onto one blank square, then promptly left the bag rolled up, unfinished, in another bag, on my sewing table. I found it again in my clean up last week, so decided to finish it.
It only needed one seam to sew, lining, quilting, a bind and some handles. The lining was scraps, donated by the lady who cut the squares. There was enough of it, it just needed to be be joined to make a piece large enough. The batting was scraps left over from other quilts that I had made. Once again joined to make a piece big enough for what I wanted.
So I made my quilt sandwich - backing, batting and bag outer, and pinned it all together. I even checked that my fish was in the best place for viewing. Then I decided to have a play with the quilting and do something I had not done before. Because I had added my bobbin lace fish, I thought it might be fun to quilt fish shapes and waves on the bag. I had quilted plenty of straight lines, shadow quilting, and stitching in the ditch, but stitching shapes and other lines like this was something new. I had tried once before and outlined the marks on a quilt in pencil. As a dressmaker I should have known better because the pencil has never washed out, and as a result I have stayed away from free form quilting. This time I traced the fish shapes and waves into a tear-a-way, and quilted through that. Wallah! Fish shapes and waves and no pencil markings! Why didn't I think of this before?
I was on a roll, and my bag was looking good, until I started to join it together into the bag shape. My bobbin lace fish that had taken sooooooooo long to do, was sitting at the bottom! I nearly cried! He couldn't stay there, he would wear, so he had to be moved. But how? All his working ends had been taken back through the green fabric and finished off. There were dozens of them, so he was not moving from that piece of fabric. The only choice was to move the square, but that meant unpicking quilting! So that's what I did, unpicked the quilting, swapped two squares around, then re-did the quilting. Sounds easy right? Took me a while, but I got there and my fish can now be viewed well and is safe from wear.
The bag was formed, seams on the inside bound, once again out of scraps. Then I made my handles, once again out of scraps. They contain slotted waist banding for strength and ease of making, and a layer of batting for some padding.
All in all I am happy with my new work bag, and will use it with pride. Amazing what can be made from other peoples unwanted fabric and one's own stash of scraps.
Monday, January 11, 2016
A Soft Toy
Say hello to Mr Anteater. At least that's what we have been calling him. He is with his new owner now, so I can show him off to you all. S_____ can call him what ever he likes, or rather his parents can, because he is way too little to talk about anything yet.
The pattern came from a magazine that I was loaned by a friend, a knitting magazine I think, though this little fellow is crocheted. I made him from an acrylic yarn that I had in my stash. I had two 100g balls, one blue and one variegated, and I thought this would be enough. it was, just I was pushing it at the end. Just enough to do his eyes!
He had to be stuffed along the way, and I thought I had a bag of fiberfill in my stash. I looked everywhere, but what I thought was fiberfill was actually scraps of batting. I did harbour thoughts of cutting the batting up into tiny pieces and using that to stuff him, but thought he may turn out a bit lumpy. Then I found some old cushion inserts that were waiting for new covers, so they are not cushion inserts any more! The filling of one has become a bag of toy filling!
Anyway, he is finished now, and being cuddled by his new owner. He was certainly something different for me to make, and the first soft toy I have made for a very long time.
The pattern came from a magazine that I was loaned by a friend, a knitting magazine I think, though this little fellow is crocheted. I made him from an acrylic yarn that I had in my stash. I had two 100g balls, one blue and one variegated, and I thought this would be enough. it was, just I was pushing it at the end. Just enough to do his eyes!
He had to be stuffed along the way, and I thought I had a bag of fiberfill in my stash. I looked everywhere, but what I thought was fiberfill was actually scraps of batting. I did harbour thoughts of cutting the batting up into tiny pieces and using that to stuff him, but thought he may turn out a bit lumpy. Then I found some old cushion inserts that were waiting for new covers, so they are not cushion inserts any more! The filling of one has become a bag of toy filling!
Anyway, he is finished now, and being cuddled by his new owner. He was certainly something different for me to make, and the first soft toy I have made for a very long time.
Tuesday, November 24, 2015
A Sampler Nearly Finished
I have been working on my sampler again. Yes, this is the same one that has been going on for nearly 10 years! It it that long? Well, considering it started way back in 2006, the maths does add up!
Beginning as a Counted Thread Round Robin that travelled the world, this sampler has had a little hic-up along the way. The main one was the broken threads, but that can be read about here.
The broken threads have been fixed for a few years now, and every now and then I pull the sampler out and add another band to it. At the beginning of this year, I made a resolution to myself that it would be finished this year. Mmmmmm............ maybe not finished, but it will be close.
Over the last few months I have added a few new bands, some narrow, some wide, trying to add some interest as well as light and shade. I have kept with the original pink and green colour scheme as I think it looks fabulous.
So far I have added in a Wessex band to cover up the fixed broken threads, a fine back stitched border with contrasting four sided stitches, a counted zig-zag band with back stitched border, another row of back stitch with contrasting intermittent cross stitches and half cross stitches, a row of coloured needle weaving, and finally another row of back stitch spaced with back stitch diamonds that have been filled with a contrasting four sided stitch.
I started yet another band on Saturday, only to find yet another broken thread! I wonder how many more I will find? This broken thread was nowhere near the last group, and so far seems to be the only one. It's been fixed now, an easier fix than the last group, so I can continue on with my stitching. This row will be the final one on the right, then I have a space of about 8cm to fill at the other end before it is finished. I have even found some fabric to line it with and turn it into the bag that it was always intended to be. So watch this space, this sampler will soon be finished!
Beginning as a Counted Thread Round Robin that travelled the world, this sampler has had a little hic-up along the way. The main one was the broken threads, but that can be read about here.
The broken threads have been fixed for a few years now, and every now and then I pull the sampler out and add another band to it. At the beginning of this year, I made a resolution to myself that it would be finished this year. Mmmmmm............ maybe not finished, but it will be close.
Over the last few months I have added a few new bands, some narrow, some wide, trying to add some interest as well as light and shade. I have kept with the original pink and green colour scheme as I think it looks fabulous.
So far I have added in a Wessex band to cover up the fixed broken threads, a fine back stitched border with contrasting four sided stitches, a counted zig-zag band with back stitched border, another row of back stitch with contrasting intermittent cross stitches and half cross stitches, a row of coloured needle weaving, and finally another row of back stitch spaced with back stitch diamonds that have been filled with a contrasting four sided stitch.
I started yet another band on Saturday, only to find yet another broken thread! I wonder how many more I will find? This broken thread was nowhere near the last group, and so far seems to be the only one. It's been fixed now, an easier fix than the last group, so I can continue on with my stitching. This row will be the final one on the right, then I have a space of about 8cm to fill at the other end before it is finished. I have even found some fabric to line it with and turn it into the bag that it was always intended to be. So watch this space, this sampler will soon be finished!
Wednesday, July 29, 2015
Wild Socks
How are these for my new socks? A little wild for me but under my jeans and in my boots who will see?
These socks are my latest finish. Made from Schoppel Wolle Crazy Zauberball 4ply, a 75% wool 25% nylon yarn from Germany, which I purchased from Morris & Sons. They will be so warm!
The pattern is the Lupine Lace Socks, put out by Fiber Trends, which I purchased from The Wool Inn.
I had a lovely time knitting these socks. I had also purchased a new set of double pointed needles made by Knit Pro while at The Wool Inn, and I must say these needles are a dream to knit with. Much better than the bamboo ones I used for my last pair of socks. These will be all ready for when the snow hits nearby again. Now I will be able to get on with my shawl.
These socks are my latest finish. Made from Schoppel Wolle Crazy Zauberball 4ply, a 75% wool 25% nylon yarn from Germany, which I purchased from Morris & Sons. They will be so warm!
The pattern is the Lupine Lace Socks, put out by Fiber Trends, which I purchased from The Wool Inn.
I had a lovely time knitting these socks. I had also purchased a new set of double pointed needles made by Knit Pro while at The Wool Inn, and I must say these needles are a dream to knit with. Much better than the bamboo ones I used for my last pair of socks. These will be all ready for when the snow hits nearby again. Now I will be able to get on with my shawl.
Subscribe to:
Posts (Atom)