Saturday, November 25, 2006

Advanced Certificate Major Work No 2

One of my aims for this year was to get through the Advanced Certificate in Traditional Embroidery Techniques Course that was being offered buy our Embroiderer's Guild here in Sydney. It was lots of work, having to produce a portfolio, a visual diary, two major works, and a study in the history of our chosen technique. About 6 weeks ago I was having reservations about finishing major work number 2. I was at the point that I didn't care any more, I had achieved what I wanted and that was all that mattered. I had discovered that there was a lot more to this drawn thread world than meets the eye.

Well, today I am happy to say that my Major Work number 2 is finished! With one week to spare! All I have to do now is present my work! Yippee! So without further ado, here is is for everyone to see. I have used my own hand dyed fabric & thread and hours & hours of labour!

Thursday, November 09, 2006

Linnwood Verandah Tile Challenge


This afternoon was planned with some stitchouts of a piece of lace I have been digitizing. I set the machine up, downloaded the design, and off I went. Well, there is more to this digitizing world than meets the eye! As the design had no mesh backing behind it, I had used lots of underlay and lots of connectors which also had lots of underlay. Not so good in the machining! All it did was stitch up & down in virtually the one spot, the WSF plus gold thread got jammed under the base plate & the whloe thing ripped!

I tried again, this time with a nomal thread rather than a metallic, and I also increased the size of the design, thinking this would help. Unfortunately it didn't & the same jamming problems kept happening. Oh well, back to the drawing board! I knew I kept all the levels of my design in seperate files for a reason! It will make it easier to go back & fix.

So, Miss Muffet, if you are reading this, the Linnwood Verandah Tile Challenge is still happening, it just has to go back to the drawing board.

Tuesday, November 07, 2006


FSL Digitized Chrismas Bell

This was my first attempt at stitching out this design. The red was interconnecting well and I was hopeful. When the gold border started happening I knew it wasn't going to hold together well. The outside edge didn't even connect with the red center. So I let it finish stitching, and before I washed it out, I manually stitched another row of zig-zag so it would connect the outer border & the red center together. It overlapped on my screen so the only thing I think could cause this to happen is "pull compensation" or the WSF was not tight enough in the hoop. I thought I had the WSF drum tight so I must look into pull compensation. Something else I need to learn about.

Back to the drawing board to fix up the file. I then stitched out a second one but in different thread. The design stitched out well.

Now to the wash out test. The red bell shrunk heaps and the gold one only stightly. As they were both stitched on the same WSF I can only conclude that the thread played a part. The file was only changed slightly to bring the border in closer, so I don't think that played any more part other than to have the border connect to the body of the bell, which was the problem in this red one.

I've now printed out a template which I will use when I block them. It should help keep the shape more true to what I want.

Monday, October 30, 2006


Machine Drawn Thread

Saturday was a huge lot of fun. Some friends & I had arranged to meet at my house & have a sewing day. Two of us wanted to explore the world of machine drawn thread work.

I thought I would be well prepared and had a design all ready. I had chosen fabric delibrately with a huge slubby thread that would be easy to pull out. The end result was going to be a book cover and I wanted the design to sit a certain way. I carefully machined around the outline & set about withdrawing the threads. Traditional drawn thread work is 90% preparation & 10% stitching. Well................ this was 99.9999999999999999% preparation & 2 seconds of machining fun! So much for the book cover! I got one little section of my design done & it instantly became a UFO to be changed into machined cutwork!

Back to the drawing board! I cut another piece of fabric & just pulled the threads out right across the width. This still took some time & was still far more preparation than stitching!

The fabric was huge slubby threads one way & little soft fluffy ones the other. It was the little soft fluffy ones that I got to stitch over. I set the machine on the widest zig-zag & off I went! Those fluffy little threads got eaten up by the zig-zag big time! I had only to move the work slightly sideways & more would get eaten up!

Now the big question.................................would I do it again? Who knows! It definately has creative possibilities but experimentation is definately the key. After seeing my friend R's piece it is obvious that different fabrics will react different ways. I would have to know what I was going to end up with .

As for the day, it was a lot of fun. Lots of laughs, caring, sharing, cups of tea, lamingtons & home made bikkys . Gee, almost forgot the rocky road! Add some creativity and what more could I ask for? Hopefully this may become a regular activity!

Friday, October 20, 2006


Negative Spaces

There was some discussion yesterday on one of my groups about negative spaces. One of the girls was painting negative spaces but was not sure about how to apply it to embroidery. So I promised her I would upload some pics to show her.


This cushion I made a few years back when I forgot to take my regular stitching to my local EG group. It was lucky I had some fabric & thread to do something with & this was the end result. To answer the obvious question, yes I made the lace too. No, it was not made in one day, only born from forgetting my work!


The picture is also another example of the use of stitching the negative space. I did this one well over ten years ago & it became my holiday stitching project over about three years. The people we used to camp next to year after year used to comment " Haven't you finished that yet?" It now proudly hangs on my bedroom wall.


So JJ these are just to inspire you to take the plunge & experiment with the negative spaces in your stitching. I think you will surprise yourself.

Friday, October 13, 2006


Book Cover

Yesterday afternoon was another bit of fun. I have noticed in this digitized lace world they are doing anything from fillet crochet to cutwork to reticella and more. The list is endless, so I thought I would try for some drawn thread.

This piece was inspired by my drawn thread samples and started out with me just wondering if it could be done. With a bit of time & patience the answer is most definately yes. However, this design would not pass the wash-out test so I stitched it onto a fabric base, one of those I dyed back in at the end of August.

The end result will turn into a book cover for my resources & inspiration journal, just for my drawn thread.

Now it is back to the drawing board to produce the above design so it WILL pass the wash-out test!

Wednesday, October 11, 2006

Painting Day


Today was a bit of fun painting. I don't do it very often & I have been meaning to do this one for a few weeks. This piece is for my Seniors class which starts again in about 2 weeks. I like to give them a challenge for the first lesson of a new term & this piece of fabric is this term's challenge. I have painted it, & they will get a square each to do something with. They have been asked to bring a variety of threads & needles with them & to also think Christmas. I will give them a sheet which will give a list of instructions (ie the limits) & they have to provide the creativity. I find they really like to be told step by step what to do & this gives them a little bit of a nudge to step outside the comfort zone. What they make it into will also be their choice so we could have anything . It will be interesting to see what they come up with.

Saturday, October 07, 2006


Shoe Bag 2


Shoe bag 2 has been stitched. Now it has been done I wish I had of changed the font of the stitching and reversed the shoe itself. It would have made it just that bit more different than the last one.

Oh well, we live & learn! The next one will be really different (I hope!).

Two done, ten more to go. But who is counting?


Digitized Christmas Bells


Over the last two weeks it has been a journey of discovery with more digitized lace. This little bell took quite some time to work out ( like about 4 days!) and all of 15 minutes to stitch out. I stitched out a total of six while I was reading a novel that had to be back at the library .

They are rather cute and are just the right size for my Christmas tree.

My mind is working on how to change this to a very special little Christmas bell. I have lots of ideas going through my head, one is already on the way. The others will just have to wait their turn.

Wednesday, September 27, 2006


Shoe bags

This morning was a bit of fun stitching the front of shoe bag number 1. All that remains now is for it to be stitched up. Only about 11 more to do!

Friday, September 22, 2006


Garden Day
Yesterday was garden day. We may still be in the grips of drought in this country but the 7 inches of rain last week has my garden singing. It took me 2 hours to pull all the weeds from one plot alone. Lesson learnt ? Don't forget to STRETCH ! I thought I nearly lost this iris to the drought but I am pleased to see she has survived and showing her full glory.

On the stitching front I have played with designing more digitized FSL, ( I am hooked!) and of course there was more stitching on major work number 2.

Thursday, September 21, 2006


Digitized Lace

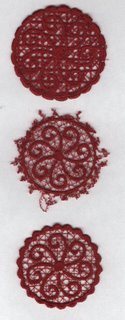
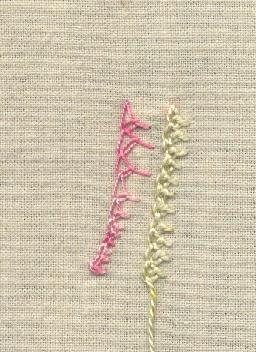
Ever since I got my computer program for my sewing machine I have been dreaming of making free standing lace. I joined a group of people who do just this and have been slowly working through the exercises. This pic is exercise two.

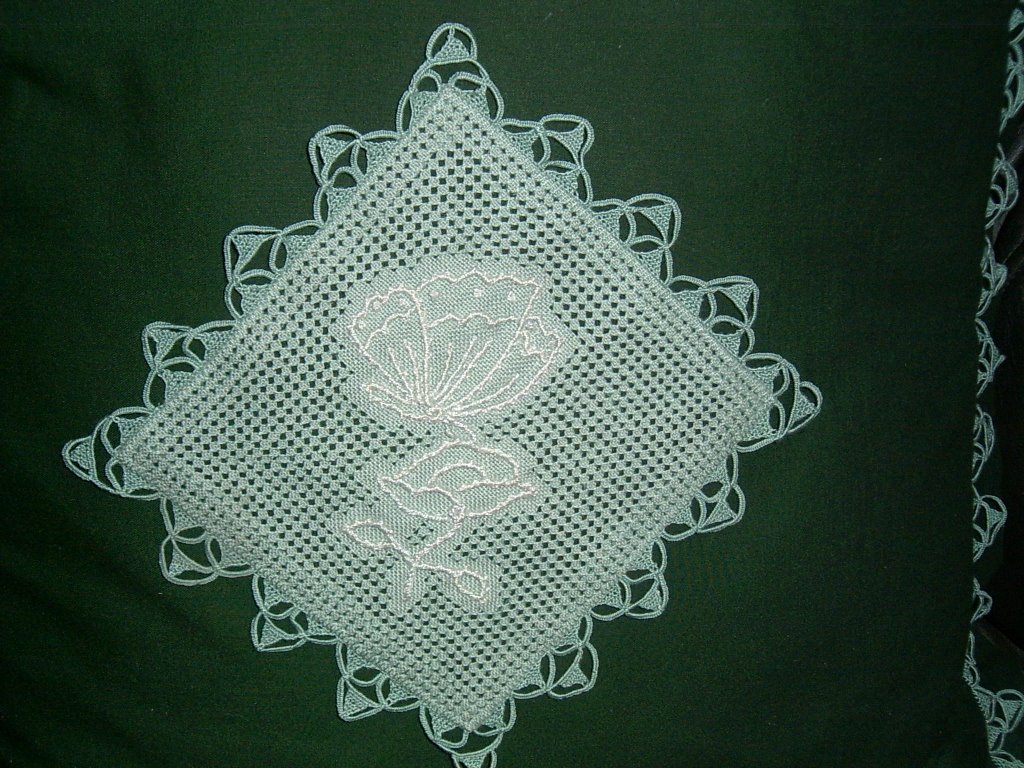
My inspiration came from a day out last week to the Art Gallery of NSW. I came home & drew up my design on a computer drawing program, imported this drawing into my machine program and went to work.

Attempt number 1 is at the top of the photo. I used an inbuilt design to make the mesh background but it was too dense to show off my scrolls so I tried again.

Attempt number 2 is in the center. This time I used my own mesh design but an inbuilt pattern run for the scallop edge. As soon as it starting stitching I knew it would fall apart so it was back to the drawing board.

Attempt number 3 uses my mesh & my scallop. It took ages to get the scallop right so that it would run neatly around the edge with no gaps & no jump stitches. I was pretty happy with this one, it at least passes the wash out test, but I know it could do with more work.

So what have I learnt?

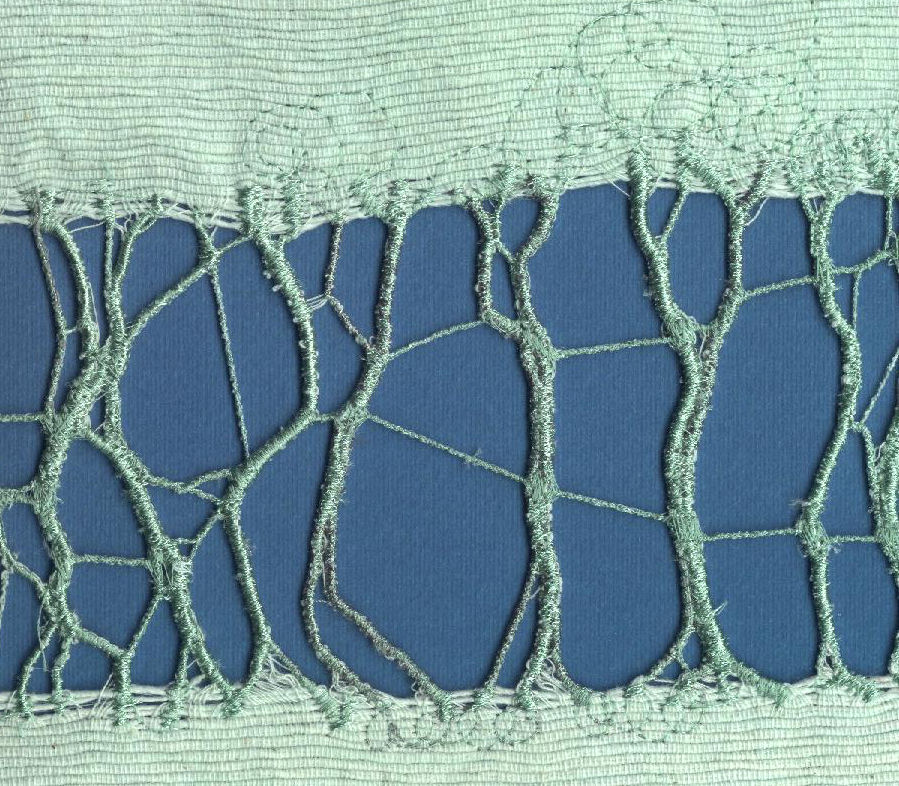
* the importance of underlay
* the importance of start & stop points
* Patience is definately a virtue
* All good things comme to those who wait.

I think there are lessons in everthing we do. I sure had some with this.
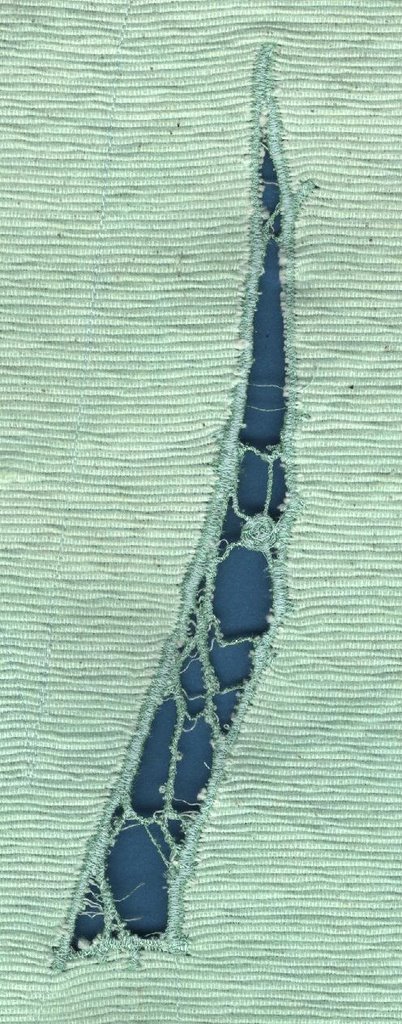
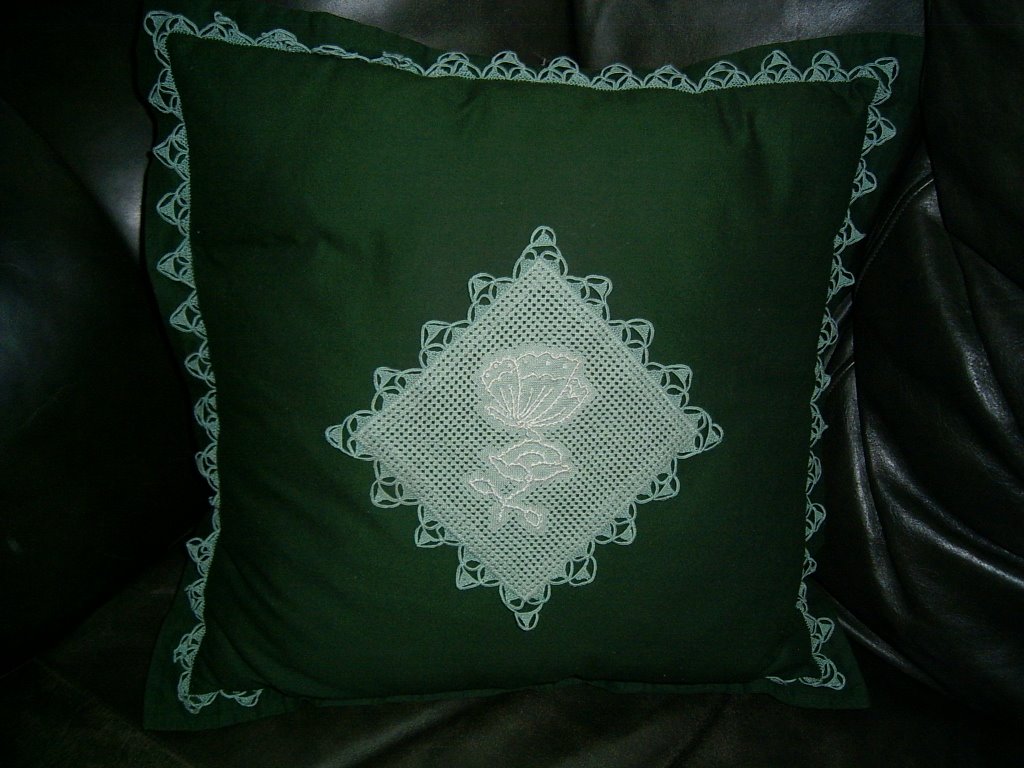
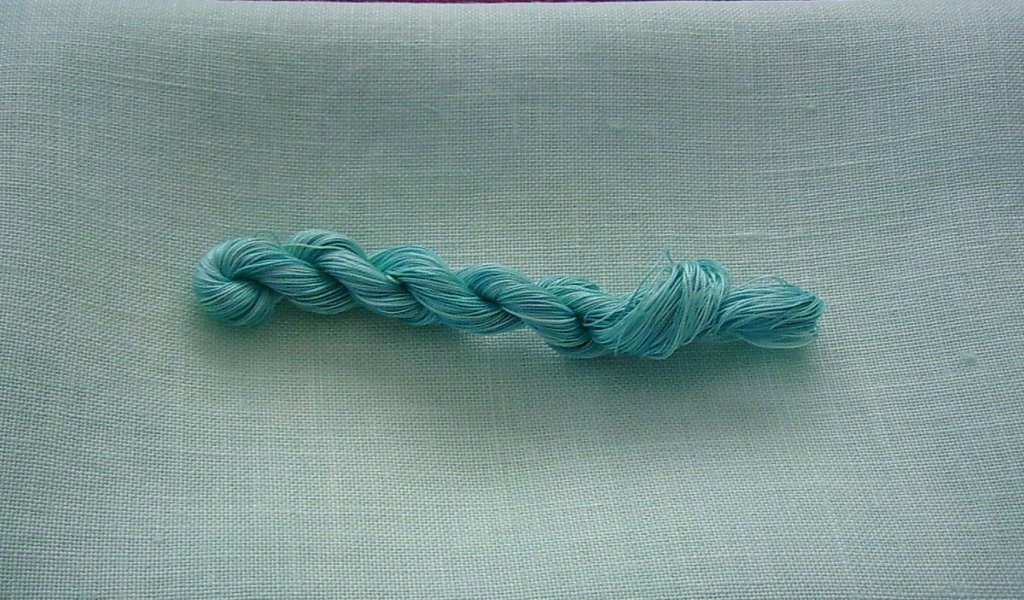
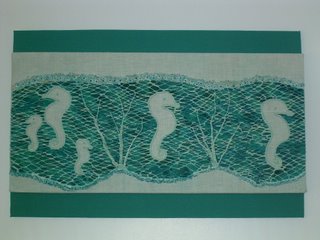
Tuesday, September 12, 2006


Test Shoes

These shoes are my test, getting ready to make items for sale at an exhibition next year. I have been asked to make shoe bags for the sales table so I decided that I could do something a little more fancy than we had last time.

These shoes have been drawn in a computer drawing program, imported into my Artista program, then digitized, then stitched on my beloved machine. I just wanted to see how they stitched out & so far I am very happy with them. Of course the colours & the fabric will change, but that is the fun part of sorting through fabrics & threads. At least I know that the digitizing part has worked.

I am definately getting better at this .......................

Wednesday, September 06, 2006

Mountmellick Stitch


Today I had a little play with Mountmellick Stitch. One of my Thursday students brought in a project that she wanted to make. It uses all kinds of stitches but she was stumped on Palestrina knots & Mountmellick stitch.

I was fine with the Palestrina Knots but had to search for Mountmellick stitch. It was a stitch I had not done before. It did give her instructions in the magazine that the project was in, but as usual they were not very clear. My good friend Miss Stitcharoo came to my help with some better instructions.

I played first with a hand dyed perle 12 thread, & went very quickly from very wide to much narrower. I then changed to another hand dyed perle 8 thread which worked much better.

It is a great textural effect & I think I could use this heaps in my work.

Tuesday, September 05, 2006


Some of you may wonder what this orchid has to do with needleart, but to me it is inspiration. Besides that, I grew it and am very proud of it!

I haven't posted for a while, things on the family front have been really busy. It isn't that I haven't been stitching, because I have! I have been working on Major work number 2 and that is going to be some while before it will be finished. I have vowed to myself that I will only post a pic of the finished piece.


I have also made myself a new skirt, it only needs the hem done to be wearable.

The fabric is pictured here, bought on a day out with the girls in Cabramatta. For those of you who don't know, Cabramatta is the Vietnamese quarter of our fair city & is just great for shopping for fabric. The food alone is worth the visit!

Enough time playing with blogs, back to work.

Tuesday, August 22, 2006


Well at long last I have finally got my pics of my dying up. I have been trying for over a week with one & over 4 days with the other. Talk about frustration plus! Now can everyone guess what colour my major work number two will be? it will be some time before the piece is finished.

I have however cut another piece of fabric today ready to make a skirt. All I have to do is turn the sewing machine on and I am in business! I feel much more motivated now that this is working again.Yippee!!!!

Friday, August 18, 2006

Dying Day for Major Work

I had another day of dying threads & fabric today. I took pics as well & once again I cannot get them to load into here. I have tried to resize, made sure I had JPEG files and nothing seems to work. Cyberspace can be so much fun but so frustrating at the same time. If anyone has any answers I would be happy to hear them.

The dying of fabric & threads today came about because my tutor helped me get over my technical glitches with my major work. If I had of bothered to look at her book (I do have my own copy!) I may have figured it out for myself. As it is, I have kept my original idea, the technical problem has been solved and I am now ready to put needle into fabric! Yipee! I now have enough fabric for the whole project and enough thread to sink a ship. I would still like more colours in the mix but I think they may be shop bought yarn.

E loved my design & the colours I dyed. Her compliments gave me that little bit more encouragement to believe in myself. So now I am off & running again!

Thursday, August 10, 2006

Yesterday I had some fun dying some fabric & thread ready for my second major work for my course. Today I have wound my threads, pressed the fabric, & taken a pic to share but for some strange reason it will not load today.

The colours look good together but I was a little dissapointed in the fabric colour being so pale. part of me is saying to over dye it again, the other part is saying to toss my current design out the window AGAIN!!! & let the fabric lead the design. I have a whole new design in my head now & I have a course meeting day on Saturday so will discuss everything with the course leader then. I really just want to put needle into fabric & go for it!!!! I'll just have to find something else to stitch tonight.

Tuesday, August 08, 2006


I got side tracked again today & had more play with beads & wire. This little flower petal & leaf are also for my Senoirs class. They want to make beaded flowers on Thursday, so I have been doing lots of research.

It was interesting playing with the different gauges & colours of wire to see the different effects & how each one handled.


Over the last few weeks I have been trying to design my second major work for my course. In the process these samples were worked.

I wanted to have a grid that changed in size to make it more interesting but as soon as I withdew the threads I knew it wasn't what I wanted. I worked the grid anyway, having some fun along the way. In the process I have gone back to another sample worked earlier in the year and this is now hopefully going to be the basis of my piece, just worked in a different direction.

The little samples were of stitches I wanted to put on my grid but that is all out the window now. Still, I know how to do them now & they will be in my folder for future reference.

Later today I intend to wind my threads ready to hit the dye pot. They need to soak in water a bit first so if I wind today, I can dye tomorrow after I come home from work.

Friday, July 28, 2006


This bracelet was inspired from a TV show where I saw bracelets being created from cardboard. I decided to take it one step further & use textiles instead. I have used hand dyed silks, hand made twisted cords, FME, wire & beads. My seniors class wanted to make jewellery this term so it is for them. I have also entered it into the July challenge for LMT which was to use purple & green. Not a hard challenge for me as I really like working with these colours.

Friday, July 21, 2006


Well I have finally finished my first major work piece for my Advanced Certificate Course. This is a self designed piece whch has arrived complete with many dramas along the way. Four months in designing, 11 weeks in stitching, threads cut that should not have been, dove's eyes worked where they should not have been, doves eye's missed where they should have been, fancy corners worked where they should not be! Next time I will have to pay more attention to what I am doing! Still, it has been a learning curve in more ways than one! Including how to fix up those areas of non- attention! Many thanks to the people who helped along the way, you all know who you are! Now what? Well, piece number two , which has to be finished by December is well into the design stage. Back to the drawing board.................................

Thursday, July 13, 2006

Book Cover


Welcome to my blog.

This is my latest creation. It is a book cover that was inspired by a challenge from The Stitchers Plus group I belong to in Sydney. The challenge was to use a found object. I found my key on a morning walk around my neighbourhood. I used the techniques of FME, reverse applique, machine embroidery & added some beads. The girls in the group have not seen it yet, only one has seen this pic. I can't wait till Saturday to see their reactions & to see what everyone else has come up with.