Showing posts with label crochet. Show all posts

Wednesday, June 17, 2020

A New Blanket

Mmmmm.... its been a while. What more can I say.

This blanket got started some seven or eight years ago, then put away when I was going away, and promptly forgotten about. Well....... other things took over.

At the time when I started it, I had no idea what it would be or how far I would go, I just started making Granny Squares. Along the way I made a decision to make some big squares, and some little squares, and to alternate them. I tried to crochet them together, but thought that gave to hard a ridge, and it was at this stage it got put away.

When I pulled it out recently, I pulled what squares I had joined together undone, and then sewed them together instead. This is what I ended up with.


The blanket grew from there, I just kept adding to it. I did a border, and it was fine. It was a good size as a throw rug for the lounge, and I still had yarn left. I had enough to repeat another border, and thought I had enough to do another row  of small squares in between. I worked it out I would need 60 of them, so just stared making squares again. If I could get 60, good stuff. If not, I would join what I could get into something else.

Well, I got my sixty squares, added them to my blanket, then did the second border. It is way plenty big enough for two people to snuggle under, or as a spare blanket for on top of a bed. It's also another UFO done and dusted.

Tuesday, March 03, 2020

My New Winter Craft Bag

Behold my new winter craft bag!

Started in 2017, it was born out of a ball of Norro yarn. I only had one ball, so decided to do some flowers in the variegated Norro, and turn them into squares that could be sewn together. I had some navy yarn, and purchased some mustard yarn to give it some life.

I made the squares, joined them together, purchased the lining fabric, and there they sat until last week.

I blocked the squares, then used them to make a pattern for the lining. Last Friday I made the lining up and hand stitched it in place. On the weekend I made some handles. I tried crocheting a tube to place over some plastic tubing, but the plastic tubing was too rigid and didn't quite work. so I pulled them undone and tried again after talking to my friend R----. These handles contain black cording to stop them from stretching.

After stitching the handles on, I felt it needed some decoration. My first thought was some crocheted flowers, but there were already flowers in the bag itself so I opted for tassels. There are three tassels in all, one navy, one orange, and one mixed.

So I now have another bag to add to my collection, and another UFO is off the list.

Sunday, June 09, 2019

A Green Scarf

This scarf was started back in November last year. I was going away and needed something small to do to take with me. I was planning on some knitting, but ended up with this crocheted motif.

The motif pattern is from my Mum's collection, cut from an Australian Home Journal, dated January 1947. It was meant to be done in No 40 Crochet cotton to form a tray cloth, but I worked it in 4 ply cotton.

I had no idea what I was going to do with the motifs. My original idea was a scarf, then I thought I may not have enough yarn. I also thought of making them into a bag of sorts. In the end I just kept making motifs and put them into a scarf.

Finished now, I'll have to find something to wear it with.

Tuesday, April 16, 2019

A Doily Bag

Over fifteen years ago I  was given a pile of un-worked stamped doilies by one of my students. Would I ever work them? Certainly not all of them. So I went through them all, kept the ones that I liked, and gave the others away.

At the time I needed a holiday project, so I picked one, chose some colours that I liked and started embroidering. I finished the stitching, then the piece sat there for many years, hidden in my UFO cupboard until I found it in a clean up at the beginning of this year. All it needed was a crochet edge to be finished!

I have lots of crochet thread in my stash, so I picked out a colour, and finished it off in a few days. Now what to do with it? Did I need another doily? Certainly not! Then I had this brilliant idea to decorate the side of a bag. So I rummaged through my fabric stash, found some scraps in similar colours, cut strips, joined them together, appliqued the doily to it, quilted it, them turned it into a bag.

It's a little smaller than I would have liked, but it will come in handy for my knitting, or taking books to and from the library. Wherever I use it, it will show off my creativity and some of my skills, embroidery, lace making, and sewing.

Friday, February 15, 2019

A Doily - UFO Number Three

UFO number three for the year!

This doily was given to me, along with quite a few others, about 12 years ago. All of them were un- worked, and were given to me by a student who had them given to her. At the time I just said thank you, and waited until I got home to have a good look. Mmm......... there were lots of them! Was I ever going to work them? Probably not, but I couldn't part with them. So I went through them, picked out the ones I really liked, and passed the others on.

This one is the first and only one I have worked. I worked it quite some years ago, it was my holiday project for a few years as I remember. According to the directions, it was supposed to be worked in yellows and oranges, but anyone who knows me knows that I like cool colours. So, I changed the colours to what I wanted. I finished the stitching, then promptly put it away to be finished later.

Last week I started to clean out my sewing cupboard. I must admit I didn't get very far, but I did throw some things out, redirected some things in other directions, and found not one, but many UFO's. Four of them managed to stay in daylight, one of which was this doily. All that need doing was to work the edge. So I went through my stash of threads, found two balls of donated 20 crochet cotton still in their plastic covers, cut the excess fabric off, and crocheted the edge according to the pattern.

So, my first doily in nearly fifty years has been finished. It's on beautiful linen, and very usable as it is. I tend not to use doilies very often, so this one is going to get put to another use. So come back soon to see what it turns into.


Sunday, December 30, 2018

A Crocheted Baby Blanket

Back in August I got word that another little baby was due in the family. I had only just met the mother-to-be, so asked another member of the family about what she would like. I was concerned about making something, only to have it not looked after properly.

I decided on using wool, as I was assured that the new Mum's mother would look after it. The yarn is Bendigo Woollen Mills Luxury Frost in 3 ply.

 I also decided on a pattern, a square that would be easy to take away and work on away from home. Unfortunately, the square proved too difficult at the time, and I decided on the above pattern instead. It was just crocheted squares joined together. How hard could it be? The pattern is from the Shepherd Baby Shawl Collection Book 1, and marked as a 4 sheep rating, the hardest in the book. I repeat, how hard could it be? Mmmmmmm............... the rating is there for a reason!

The pattern told me to make 64 squares, to me that is 8 x 8 . So I made 8 squares, then started to join them together. Mmmmmm...................... they did not sit even. So I un-pulled the joining row, looked at the picture, worked out the maths, and figured I needed 9 squares per row! That meant 81 squares! So I made nine squares, joined them on, worked the in-between mesh, and repeated the process.

I worked this way because I knew I was going away. My plan was I could take squares with me to do and join them together when I came home. As I worked nine squares, I would join them on, this way all would be together and I would know exactly how many squares I could work while I was away. The problem was I had all the squares done and joined together before I went! That meant I had to find something else to take, but that's another story for later.

Anyway, the shawl was finished way before baby came. It has now been wrapped and gifted. Wool is bit hot now for bub to use, but as you can see it is quite large, and will be quite handy when the weather cools down, even for some years to come. I just hope the new Mum likes it. 

Monday, October 15, 2018

A Crocheted Blanket

Another finish, a crocheted blanket.

This blanket started on an impulse buy. I spotted some yarn cakes at Lincraft and loved the colours. I'd heard so much about yarn cakes, so I bought three of the same colour way on impulse to give them a try.

What to make? How far would my three cakes take me? I had no idea, so I just started crocheting squares. I believe now the cake yarns are supposed to be self striping. Just like me to be different, instead  I got miss matched squares.

I tried pressing the squares to get them to sit better. The smell produced was one that disagreed with me. It was at this stage that I decided to give it away.

I continued to make squares, as many as my cakes would let me. When I had enough for a blanket, I sewed them together. I was hoping I would have enough left to do a border. In case I didn't, I went looking in my stash and found a navy acrylic that I could use at a pinch. The cakes were equal to a 10 ply, while the navy was an 8 ply. Not sure how it was going to work but I would give it a try.

I was also concerned that the navy may have been too dark, so I started with a row of chains and double crochets. My idea was that the chains would be covered in a row of trebles  in the cake yarn on the next row of the border, and so just leave me with little spots of navy. I was hoping that I could get just one colour of the cake yarn to go all the way around the blanket for this part of the border, but no. Continuing in the style of cakes, I have a colour change. Not to worry, I just did another row of navy.

This would be my final row, so I decided to do a row of picots. I felt a shell edge would be too solid, and in the navy would be too much. The picots would add an interesting edge without too much navy.

So the blanket has now been blocked, and looks better, though the smell still disagrees with me. So I have asked a friend of mine who does a lot of work for charity if she would like it. So my little blanket will go to a charity somewhere, hopefully to be loved by someone. I am sure it will. I have had my experience with cake yarn now and I think that will do me, and I can now go back to my beloved Bendigo wool.

Monday, December 18, 2017

A Stash Buster Baby Blanket

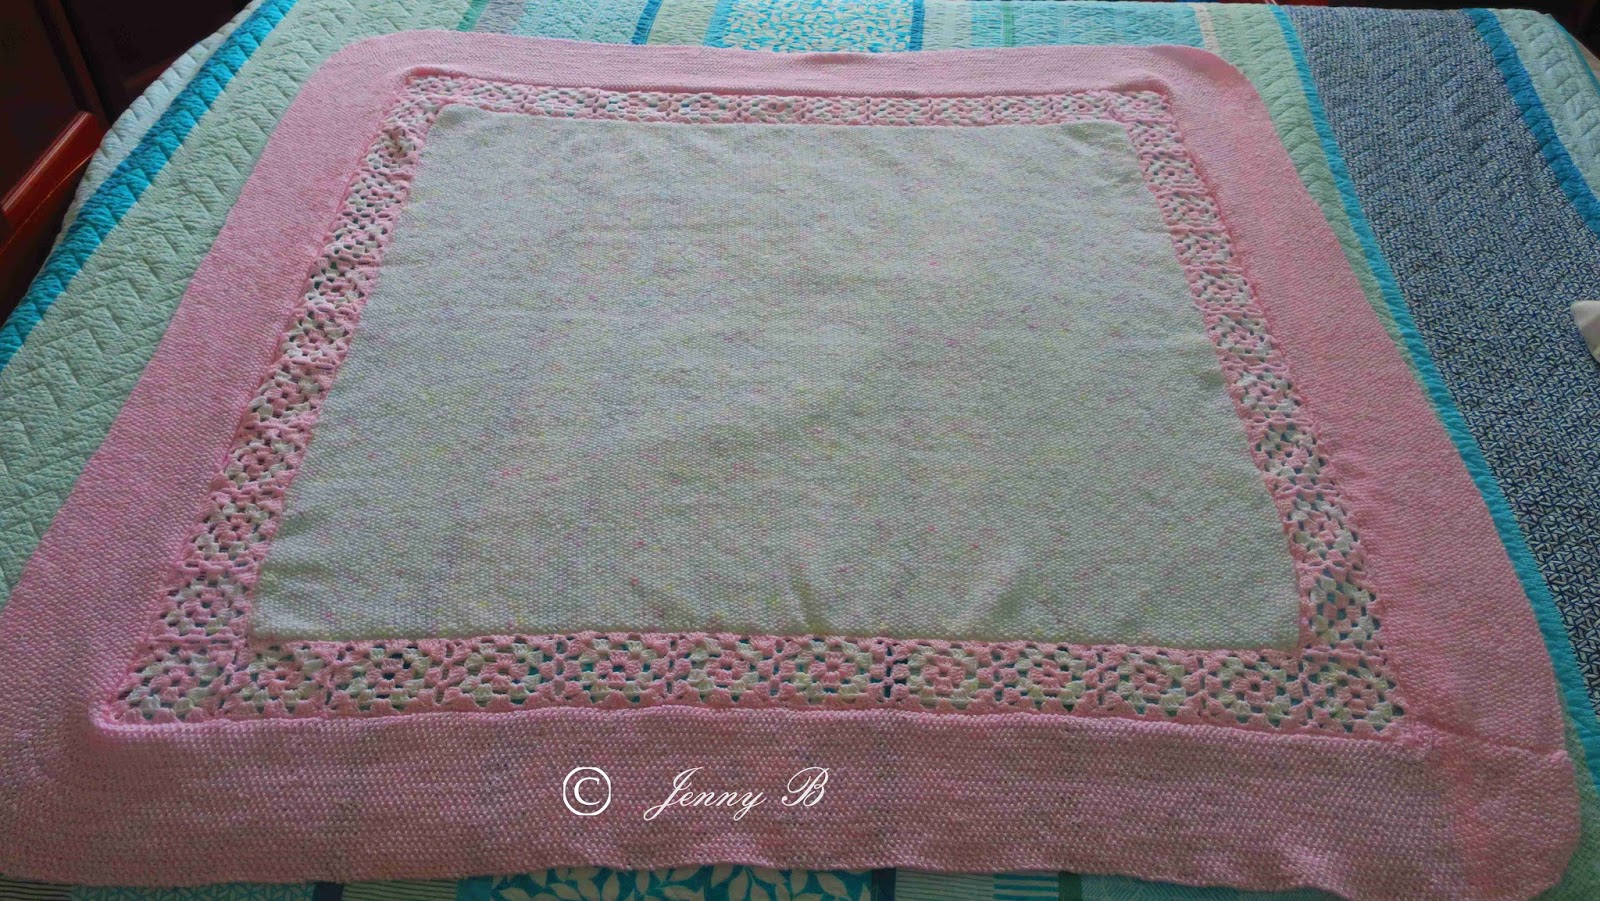
I've done a few baby blankets now, but this one is the first one that I have not used a pattern for. It is also the first time that I have combined knitting and crochet together.

It began when I heard through the family grapevine that one of the nieces was trying to have a baby. I thought I could make a blanket for her now, and  it would be ready if and when this baby arrived.

I was thinking that I could order some more wool through Bendigo Woollen Mills, then remembered I had some in my stash that I had purchased many years ago. It was acrylic, not my favourite to work with.

At the time that I purchased the yarn, another lady I know had just had her first daughter and I wanted to make her something small, so I only purchased a few balls of the pink and the white yarn. I stared on a little matinee jacket, but felt the yarn was not suitable for a newborn's skin , and I changed my mind to make a blanket instead. Silly me, of course a blanket was going to take way more time and way more yarn, so back to the shop I went to purchase more. As this stage, the store was only selling whole packets of yarn ( they we going to close down so I found out later), so ended up with ten extra balls of pink and ten extra balls of white. Mmmm......... a lot of yarn, but I knew it would all get used one day.

Needless to say the original purpose of the yarn didn't happen, it ended up a blanket that I gave to a family member when she had her daughter. That blanket can be seen here. Even after completing a blanket, I still had heaps of yarn left, and thought that if I combined the two colours together I could get another blanket for this hoped for baby.

So then I started searching the internet for ideas, and found one that had a border of granny squares .  It got me thinking, and I started making granny squares. Then I had to work out the center, it had to fit, so some maths was involved that didn't really work out so I added in more granny squares to compensate. I pondered over what pattern to put in the center, and decided to use just plain old moss stitch. It would give a texture without distracting from the granny squares, and it wouldn't curl at the edges and make life difficult. Then I added another  border in pink, also in moss stitch.

OK, so the blanket is finished. The original family member that I made it for is still not pregnant ( as far as I know), then when she does conceive, it may even be a boy. So what do I do with this blanket? At the moment it is packed away ready for the first baby girl that comes along. There are at least two babies due within the extended family in 2018, but I have planned other projects for those two. We will see, it may even go to charity yet.

Monday, January 11, 2016

A Soft Toy

Say hello to Mr Anteater. At least that's what we have been calling him. He is with his new owner now, so I can show him off to you all. S_____ can call him what ever he likes, or rather his parents can, because he is way too little to talk about anything yet.

The pattern came from a magazine that I was loaned by a friend, a knitting magazine I think, though this little fellow is crocheted. I made him from an acrylic yarn that I had in my stash. I had two 100g balls, one blue and one variegated, and I thought this would be enough. it was, just I was pushing it at the end. Just enough to do his eyes!

He had to be stuffed along the way, and I thought I had a bag of fiberfill in my stash. I looked everywhere, but what I thought was fiberfill was actually scraps of batting. I did harbour thoughts of cutting the batting up into tiny pieces and using that to stuff him, but thought he may turn out a bit lumpy. Then I found some old cushion inserts that were waiting for new covers, so they are not cushion inserts any more! The filling of one has become a bag of toy filling!

Anyway, he is finished now, and being cuddled by his new owner. He was certainly something different for me to make, and the first soft toy I have made for a very long time.

Tuesday, July 14, 2015

Pretty In Pink


This pretty pink scarf came about from scraps. One of the ladies in my local sewing group was having a de-stash, and I found this lovely piece of pink embroidered cotton voile. It was long and narrow, perfect for making a scarf, so I tucked it away in my stash with a little note as to what was to be done with it. That was way back in the beginning of last year.

Then a while back, I needed a quick project to do one group day, so pulled this pink fabric out, found some matching thread, took it to group day and proceeded to hem it.


The hem is a very fine turned zigzag, to me it is much quicker and easier to do than threading the over locker to do a rolled hem. As I was hemming it, I was thinking of what to decorate the ends with. It did come to mind that I could add some free standing digitized lace flowers, to match the flowers in the embroidery. More work, but hey, I could handle that, and it would be a good challenge.

When I got home, I searched through my stash and found a ball of crocheting cotton, that was the perfect pink. So rather than going to all the time and effort of digitizing some free standing lace, I decided to crochet some flowers instead.

The flowers add another dimension and some weight to the scarf, even if they do get tangled. I crocheted the flowers first, then added a chain length to add them to the ends of the scarf. I had previously added a little edge in crochet all the way around to help give it more strength and weight, and this is what I attached the flowers to.

Pink is not a colour I normally wear, but it may jazz up a navy or white top in spring or even jazz up a hat in summer. Whatever it goes with, it is finished, and I have something off my to-do list.

Sunday, August 12, 2012

A Baby Blanket UFO

There is nothing like a new baby in the family to spur on the finish of a UFO. This little baby blanket started life quite some years ago as a little baby matinee jacket. At the time it was earmaked for another little girl, but once I started it I felt that I wouldn't like the yarn up against a new born baby's skin, it wasn't soft enough. So I pulled it all undone & started this blanket instead. It is simple chains & blocks of trebles & I very soon got bored with it. Consequently it soon got put aside for more interesting things & so became a UFO. Then last Monday I got an early morning call to say a member of family had given birth to a little girl. Mmm..... time to pull it out & finish it. It was only about 1/3 done, so there was still lots to do, but I had it completely finished in three days & handed over to the proud parents. Congratulations go out to S & A on the birth of their beautiful daughter & I hope they find the blanket useful.

Monday, March 19, 2012

A Crochet Experiment

Last year I had a lovely day with my friend M____ in the City shopping for yarn. As we walked into one store, I spotted a lovely scarf that was just crocheted squares joined together. At first glance they were Granny Squares, but on closer  inspection they were a little different than the usual Granny Square. I could have bought the pattern, or made a sketch & figured it out myself, but I came to the conclusion that any motif would work. So home I came, & ventured through all my Mum's crochet magazines (that I now have) looking for an appropriate motif pattern. I found heaps in my search, including one triangular one which I thought could prove interesting & different. In the end it was too big, so I modified it down to what you see above.

I set about crocheting the motifs in a cheap & nasty variegated acrylic yarn, then had fun trying to join them all together. I still have yarn left but feel that the scarf is long enough, especially as I feel it needs a "finish" on the ends. What the finish will be I have no idea, as I feel a fringe is not quite right. Any one got any suggestions?

I wouldn't mind making another one, but next time in something finer & much better quality.

Tuesday, February 28, 2012

My New Scarf

Finally finished! This is a scarf that I started at the end of winter last year. The yarn was fine, very cheap & very old, so consequently caused me many problems.

I chose a pattern off the Net, then proceeded to use only part of the pattern. It was very simple, involving only a few stitches and eight rows in the repeat. After a few rows, I found I was making mistakes, & proceeded to try to unpick it stitch by stitch. Because the yarn was so fine, it was difficult doing this, so I decided to rip out the needles & start again. Trying to unravel the work already done, the yarn gripped to itself, & would not unravel. I tried to gently coax it with a tug, but only succeeded in breaking the yarn. Mmmm............... old yarn............is it worth the hassle?

Well, it kept my fingers busy so I kept on with it, mistakes and all. There are plenty of mistakes, & I will be the first to point them out. They remain in the scarf purely because of the age & gripping factor of the yarn. I knew if I tried to unpick them I would end up with problems again, so I made a choice to leave the mistakes in. I figured that once scrunched & rolled around my neck, the mistakes would not be seen.

The fringe at the end is crocheted. I wanted something different to the normal fringe, so crocheted some rings & chains & attached them to the ends.

OK, so it may not get an A+ on any marking scale, but it is warm & will be great on those cold winter mornings that will be sure to come in a few months time.

Friday, December 02, 2011

Christmas Is Coming

Every year try to make a new decoration for my Christmas tree. This year I have a fixation for crocheted snowflakes, & I have found so many different ones that it is hard to choose. I am not sure why the snowflakes as it is usually quite hot here in Australia over Christmas. Maybe I think they will cool it down.

This is the first crocheted one I have done, hung in a cheap metal bracelet from a $2 store. I was lucky that this one fitted in the ring, the other one I have done is too big, so I will have to find some other way to hang it.

At this point I would like to wish my regular readers a Very Merry Christmas & a creative 2012. I have put this out early as I know things around here will be pretty busy for the next few weeks. So until I return in January,

Christmas Wishes to All

Friday, July 01, 2011

Irish Crochet Bits

On & off for a while now I have been continuing with some Irish crochet. In particular I have been playing with leaves, wanting to get them with little bumps on the edges. I have found the leaves tricky, trying to start them over the cording. The thread is fine & leaves nothing much to hold onto when starting. Once I get going I am fine, & then it is the picots on the edge giving me curry. It is hard trying to get them the same. My biggest problem is that I don't sit at it in anyone hit, it might be two or three weeks between sittings & in that time I have lost my flow & have to find it again. I have many more of these little picoted leaves to make to finish the project I have to do. Maybe I should just sit & do them, but my scarf is nearly finished & the reticella is calling.

Friday, March 25, 2011

Irish Crochet Play

I've been playing with some Irish Crochet lately, getting ready for a challenge for one of my groups. My Mum taught me to crochet when I was very young & I have wanted to do Irish Crochet for many years. I thought it was just crocheting motifs & joining them together, but on doing a little research I found it to be much more involved (isn't anything?) , and much more challenging that I thought.

So after practicing some new techniques & getting the feel of them, I present my first ever leaf. It is far from brilliant, and I am sure they will get better, but it is the best motif I have done in my practice. With all the other motifs I have been practicing on, I came across challenges, two of which have been solved on this leaf. So now I am off to find some matching thread & cord, to have another go ready for the real thing.

Monday, January 31, 2011

Filet

Well, the cream table mat that I mentioned in my last post is finished, well almost. All the stitching is done, & it just needs to be blocked & cut from the remainder of the linen. So you will all have to be patient to see pics.

One of the ideas that I had for this piece was to work some filet in the center. I set myself a challenge way back in November 2007 to try the technique & did so here & here. Filet can be produced a few different ways. It can be crocheted , made with pre-made purchased nets, or on nets made by ones own hands. Adriana over on her blog has shown us some of her stunning examples here, in which the netting is made with a needle & thread, sort of like a fishing net. A different type of net can be made by withdrawing threads from fabric, like in the photo above.

I have tried filet crochet, & working on pre-purchased nets. The crocheting is easy, the purchased nets upset my hands & give me dermatitis, so working on meshes made from withdrawing fabric is my next mission, and was to be included in my cream table mat. However, after working the above sample, I decided that the filet would not suit the border that I had stitched, so scrapped that plan & looked for another filling. That still left me with this sample that I had to find a design to fit the space. It needs to be stitched before I can block my cream table mat as the sample is on the edge of the fabric.

So on Saturday I went searching for a design that would fit. I have graphed it out, & spent hours on the stitching order ( which has to be worked out first). Finally yesterday I got to stitch my little design, ( a practice on my pre-purchased mesh), hours of planning for 5 minutes of stitching! Oh well, I put it all down to practice & the planning maybe won't take so long next time. There should be pics of my practice piece soon & then I will work on the fabric mesh above. All have to be done before I can block my cream table mat.

Tuesday, September 07, 2010

An Exhibition

Those people who know me well know that I belong to a few different textile inspired groups, one of which is called "Stitcher's Plus". We are a group of creative minded stitchers, and have been meeting & stitching together for over ten years now. Recently, we put together a collection of our works into an exhibition. Below are the pieces that I had in this exhibition.

First up is a book cover. This was the piece of Reticella that I worked for our tenth anniversary calendar. The piece has been sitting for quite some time waiting to be made up into a finished piece. I needed a book cover, so a book cover it has become, & how fitting that it should be a cover for my lace journal.
Next is a piece of Teneriffe Lace that I inserted into a handkerchief. Inspired by pictures of teneriffe lace that I have seen on the internet, I have been playing with different designs using the technique. This was one design that I found, & had to work out the method by myself as there were no instructions. Not my design, but definately my stitching, and was great fun using the brain to work it all out. It was relativley easy once I thought about for a few minutes.

Piece three is my first piece of Reticella which I showed you all here. This piece has been in two other exhibitions, and will probably go in at least another one or two. I am extremely proud of this piece.

Piece four,"A Summer Sanctuary", has also been exhibited twice before. The challenge proceses involved can be read here.
Next is a bag that I made from a challenge we were handed invoving faces. The face has been created using applique & FME, then pieced into the front of the bag.

The back of the bag has been pieced using the Flying Geese pattern & the whole bag has been machine quilted. This face has become my internet face & anyone who knows me personally will tell you I look nothing like this. A bag I use a lot.


Then there was my scarf. Made with a daisy wheel using a fancy knitting yarn, then crocheted together. Very slinky & warm.

Finally, my "Bugs In Boxes". These were another challenge & both consist of a painted canvas backgrounds which have been threaded with various yarns . Both also consist of couched yarns for the tree branches & leaves made from hand dyed fabric that has been FME'd with a metalic thread. The caterpillars in the top one are stuffed rouleau tubes featuring surface stitching, while the butterfly on the second one has been digitized & stitched onto water soluble fabric.


The exhibition is now closed, but for some more pics please visit our Stitchers Plus pages.

Wednesday, February 24, 2010

Crochet Flowers


I've been crocheting flowers for my local lace group, for "goodie" bags somewhere in the future. These are only a few of what I have done, all out of donated crochet thread, so all they have cost is my time. It's been a long time since I have done any crochet work & they were enjoyable to do, as they are so simple to make. I could manage two in a sitting, & if my hands cramped up I could change to some stitching & still feel like I had accomplished something.

Thursday, November 19, 2009

A New Scarf

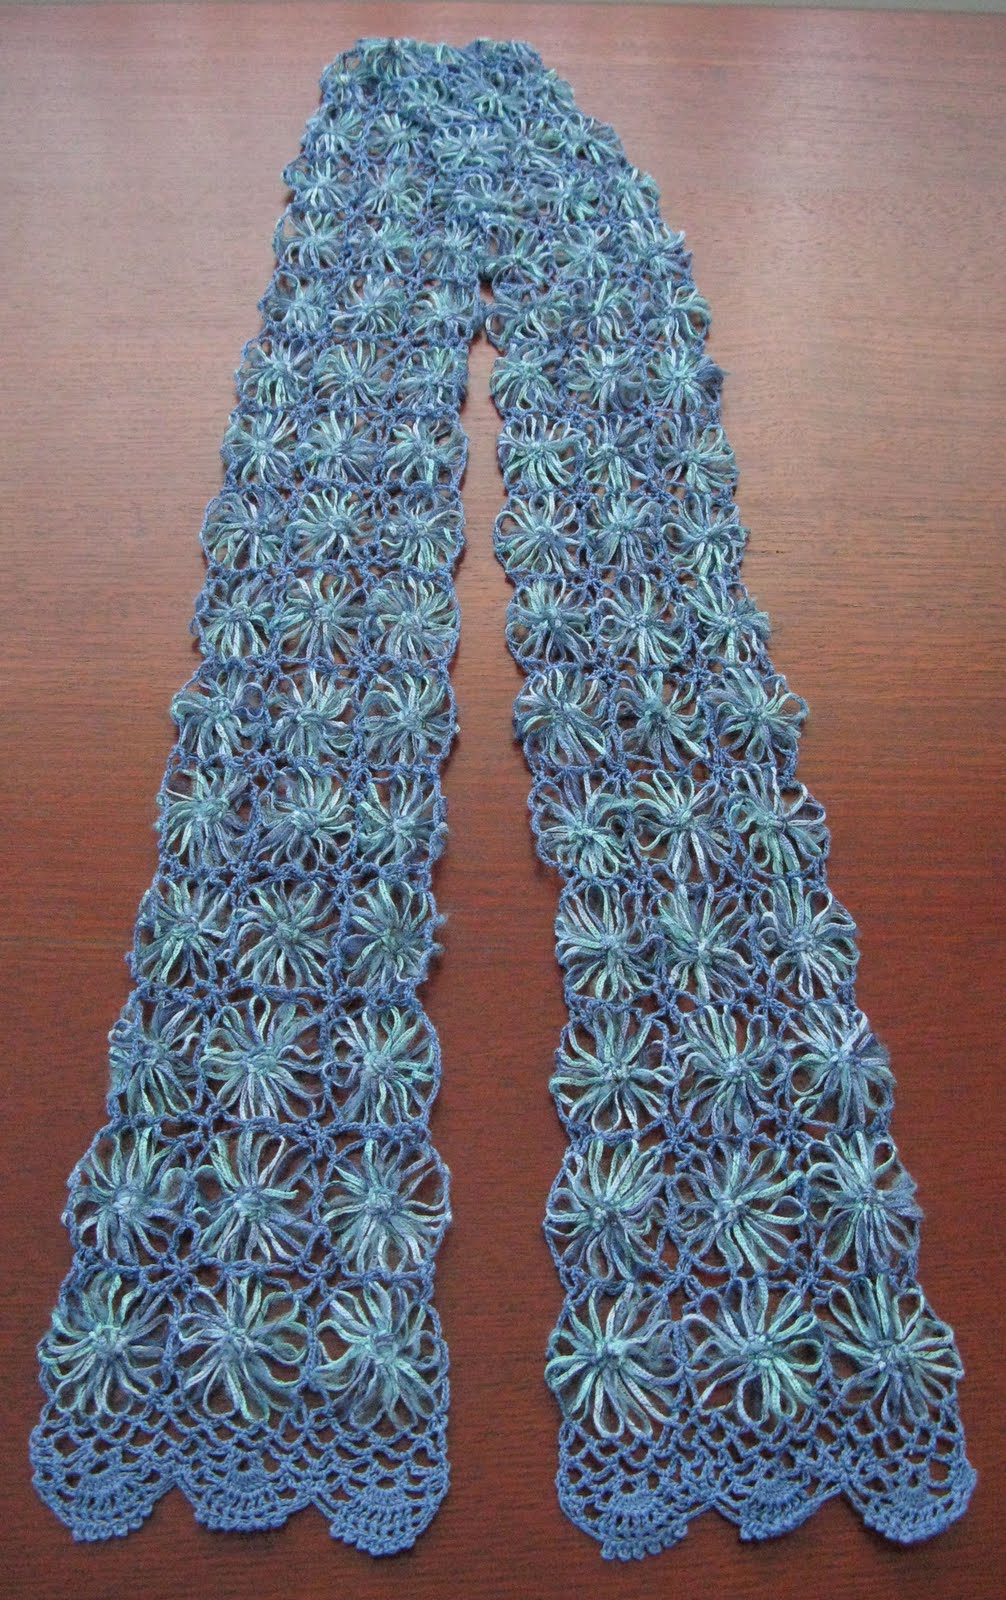
About a month ago I was playing with a daisy wheel, one of those little wheels with spikes. Since then I have been joining them together with some crochet. It took some playing to find just the right thread to use & in the end I settled on a blue perle 8. The next problem I had was how to finish the ends. I knew I didn't want a fringe, I was sure it would not suit, so I ended up with this croched edge.

Something a little different, & something I have wanted to do one for a while. I have made the daisies many times before, but they were always white & always went into baby shawls. Then last year I spotted a shawl done with these daisies, all multi coloured, and joined together with black. I had seen the shawl from a distance, as the new proud owner showed it too her lunch friends, and immediately thought to myself " I could do.....................". Now my mind is still racing with ideas of how to use these cute little daisies.